Getting Started with PROOF Workbench
Introduction
Who is this tutorial for?
- You are new to the Fred Hutch cluster, and you are looking for a streamlined application that can help you run computing jobs.
- You have experience submitting jobs to the cluster, but you are interested in making your computing more organized and parallelized.
- You find yourself needing to configure multi-step analyses where each step requires a specific computing environment.
- You want to make your computing pipelines more reproducible and shareable.
- You are interested in leveraging pre-made workflows, like those in the WILDS WDL Library.
- You are interested in scaling your computing in the cloud, but you want to test out your workflows in no-cost/low-cost environment (the Fred Hutch cluster).
Learning Objectives
By the end of this tutorial, learners will be able to:
- Describe the purpose of PROOF and explain how PROOF servers enable WDL workflows to run on the Fred Hutch cluster using Cromwell in server mode.
- Explain how Blueprints and PROOF servers relate to workflow execution and infrastructure configuration.
- Identify the prerequisites required to start a PROOF server and outline the steps involved in launching a new server session.
- Explain the purpose and scope of workflow validation, including what validation checks and what it does not check prior to execution.
- Validate a WDL workflow and associated JSON inputs, and interpret validation output to determine readiness for submission.
- Submit a workflow to a running PROOF server, including uploading required files and applying optional labels for tracking and reproducibility.
- Track and monitor workflow progress at both the workflow and task levels using status indicators, metadata, logs, and workflow IDs.
- Analyze workflow outputs, metadata, and diagnostic information to assess execution success, troubleshoot failures, and understand resource usage.
- Demonstrate how to safely stop a PROOF server and explain the implications of server shutdown for active and completed workflows.
Required Prerequisites
- Fred Hutch network access. User can connect to the Fred Hutch network on campus, or via the VPN.
- Access to the Fred Hutch Cluster. We recommend getting access by completing the Cluster 101 course from the Data Science Lab.
Suggested Prerequisites
- Familiarity with WDL workflows. We recommend the Developing WDL Workflows course from the Data Science Lab.
- Familiarity with the command line. We recommend the Bash for Bioinformatics course from the Data Science Lab. Check their website to register for a hybrid, synchronous version of the course.
Related Resources
- Find pre-made workflows in the WILDS WDL Library.
- Partner with the OCDO to build workflows for your research via the WILDS WDL Development Program.
- Need help debugging a workflow? Get live help by scheduling a Research Computing Data House Call.
- Having trouble using PROOF Workbench? Want to provide feedback or report an issue? Please schedule a Code & Software Data House Call.
Starting Your First PROOF Server
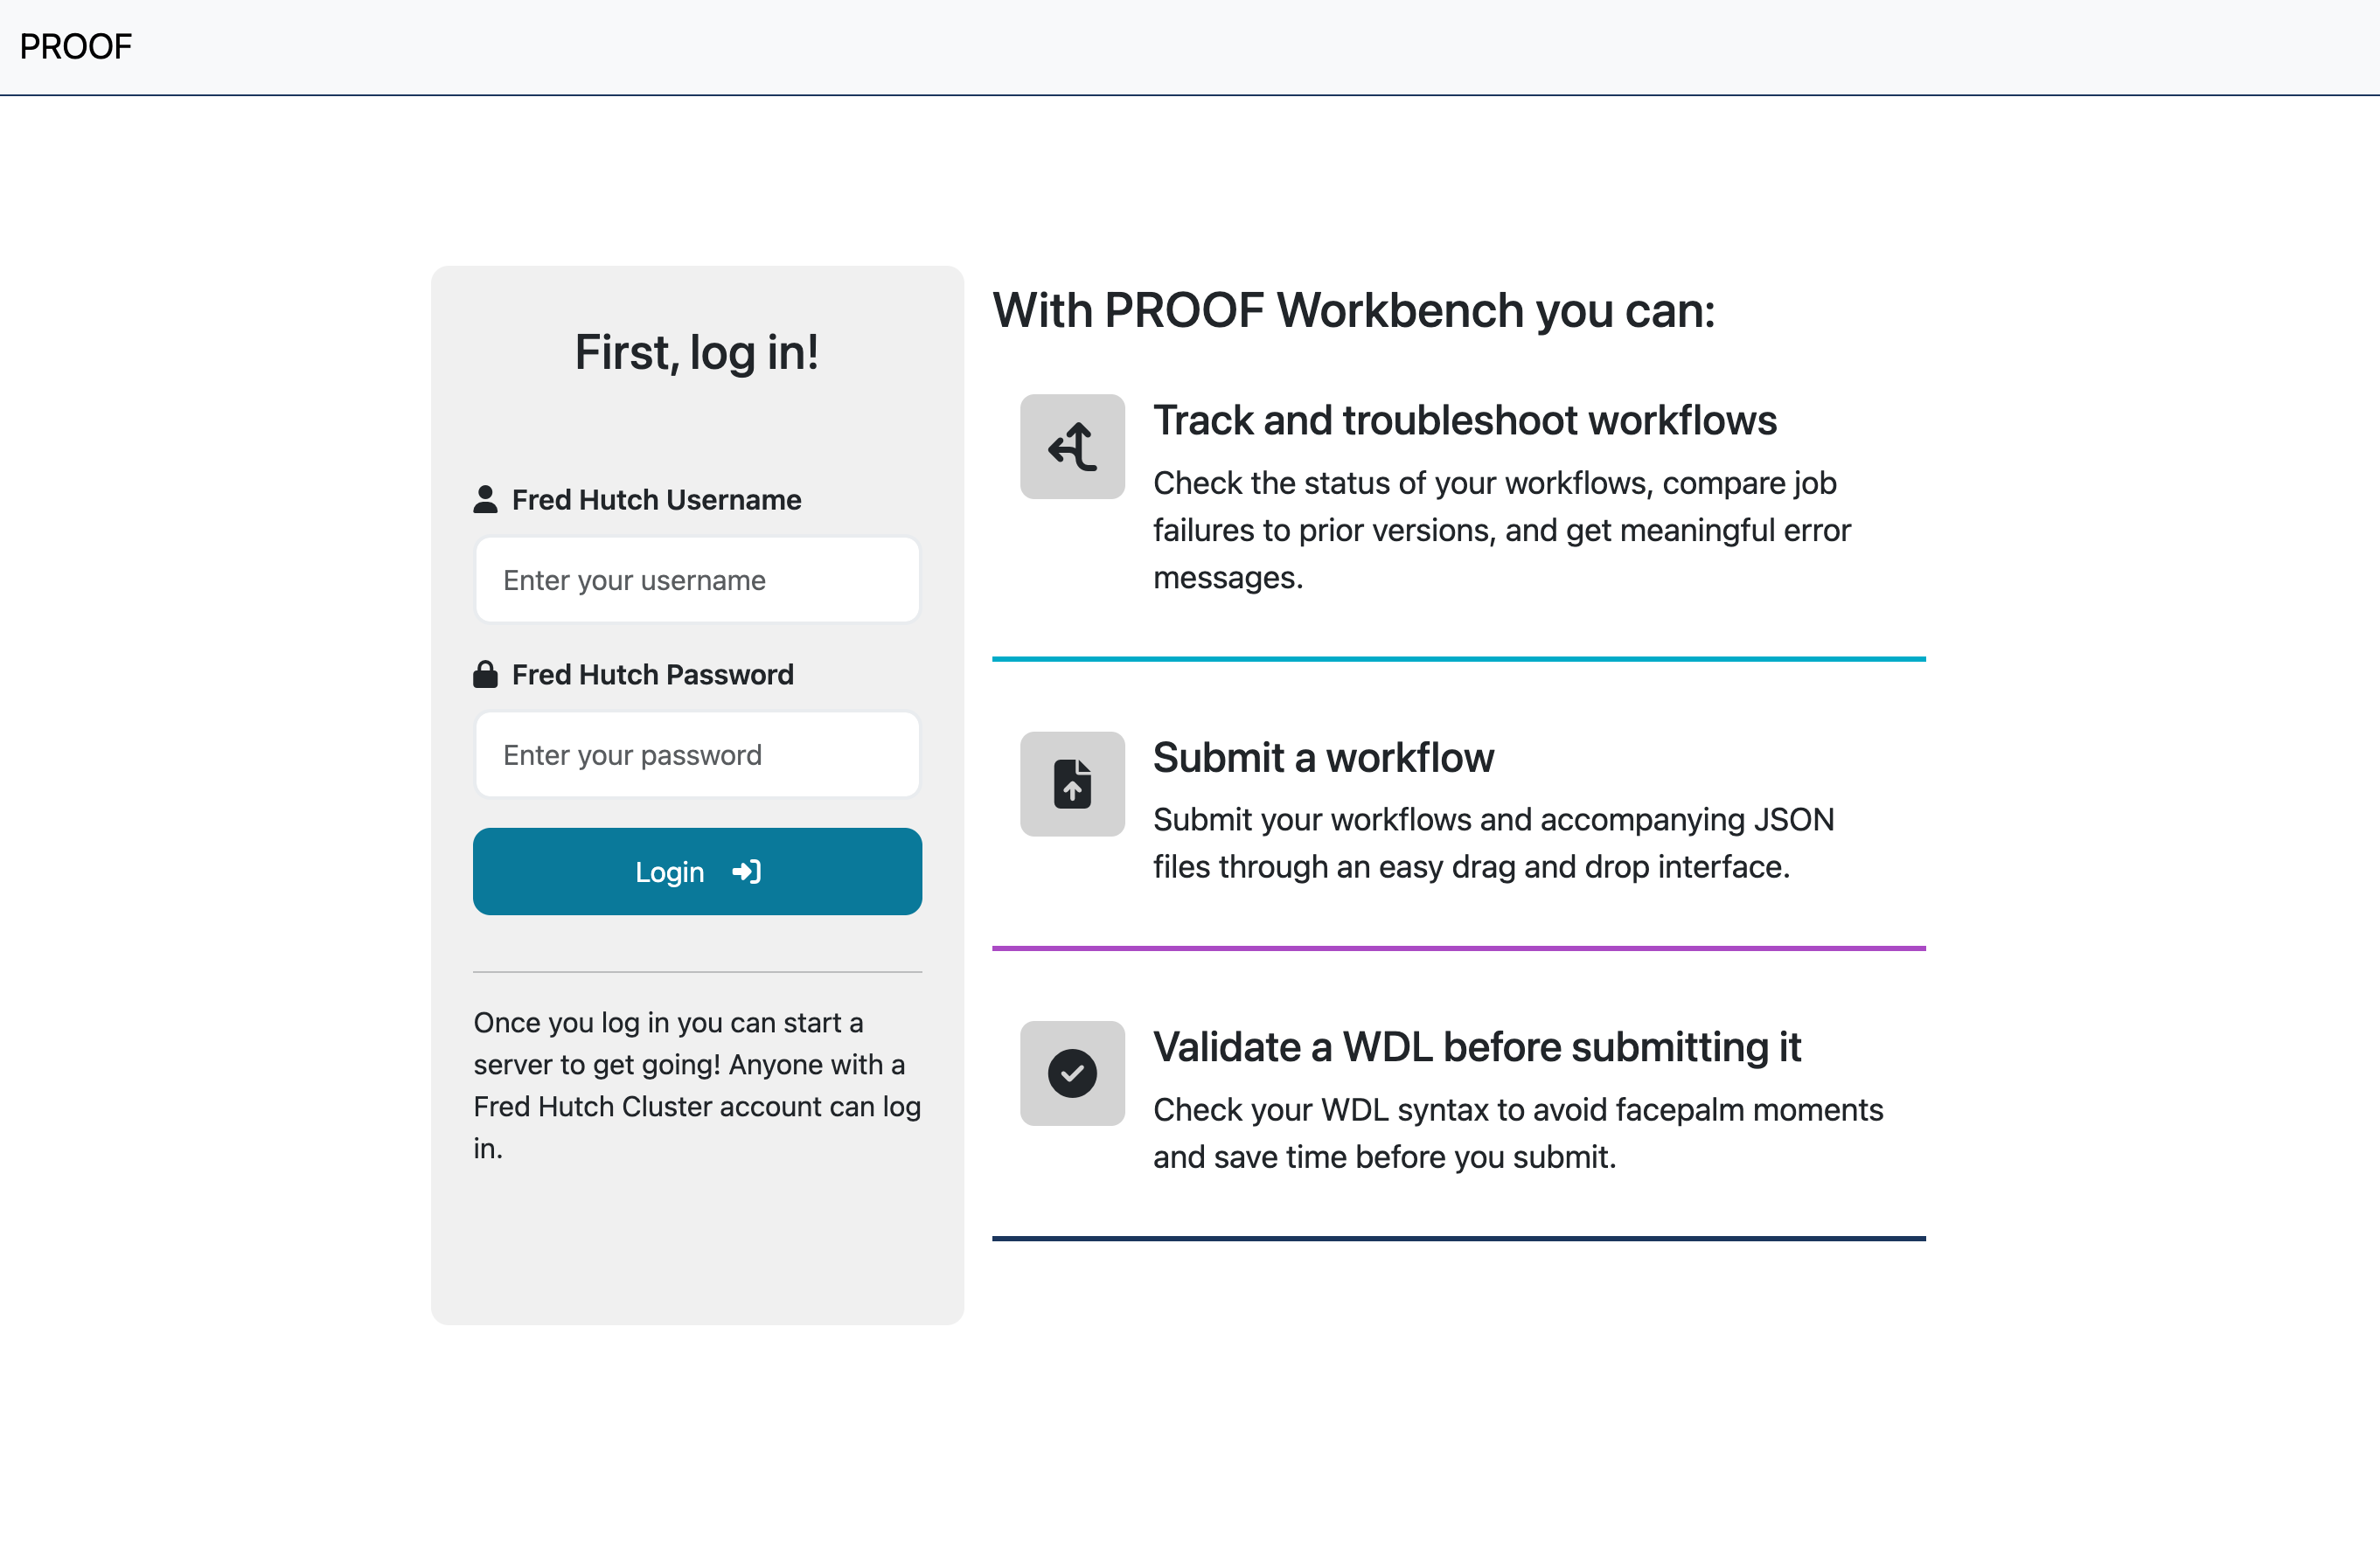
First log in with your Fred Hutch username and password.
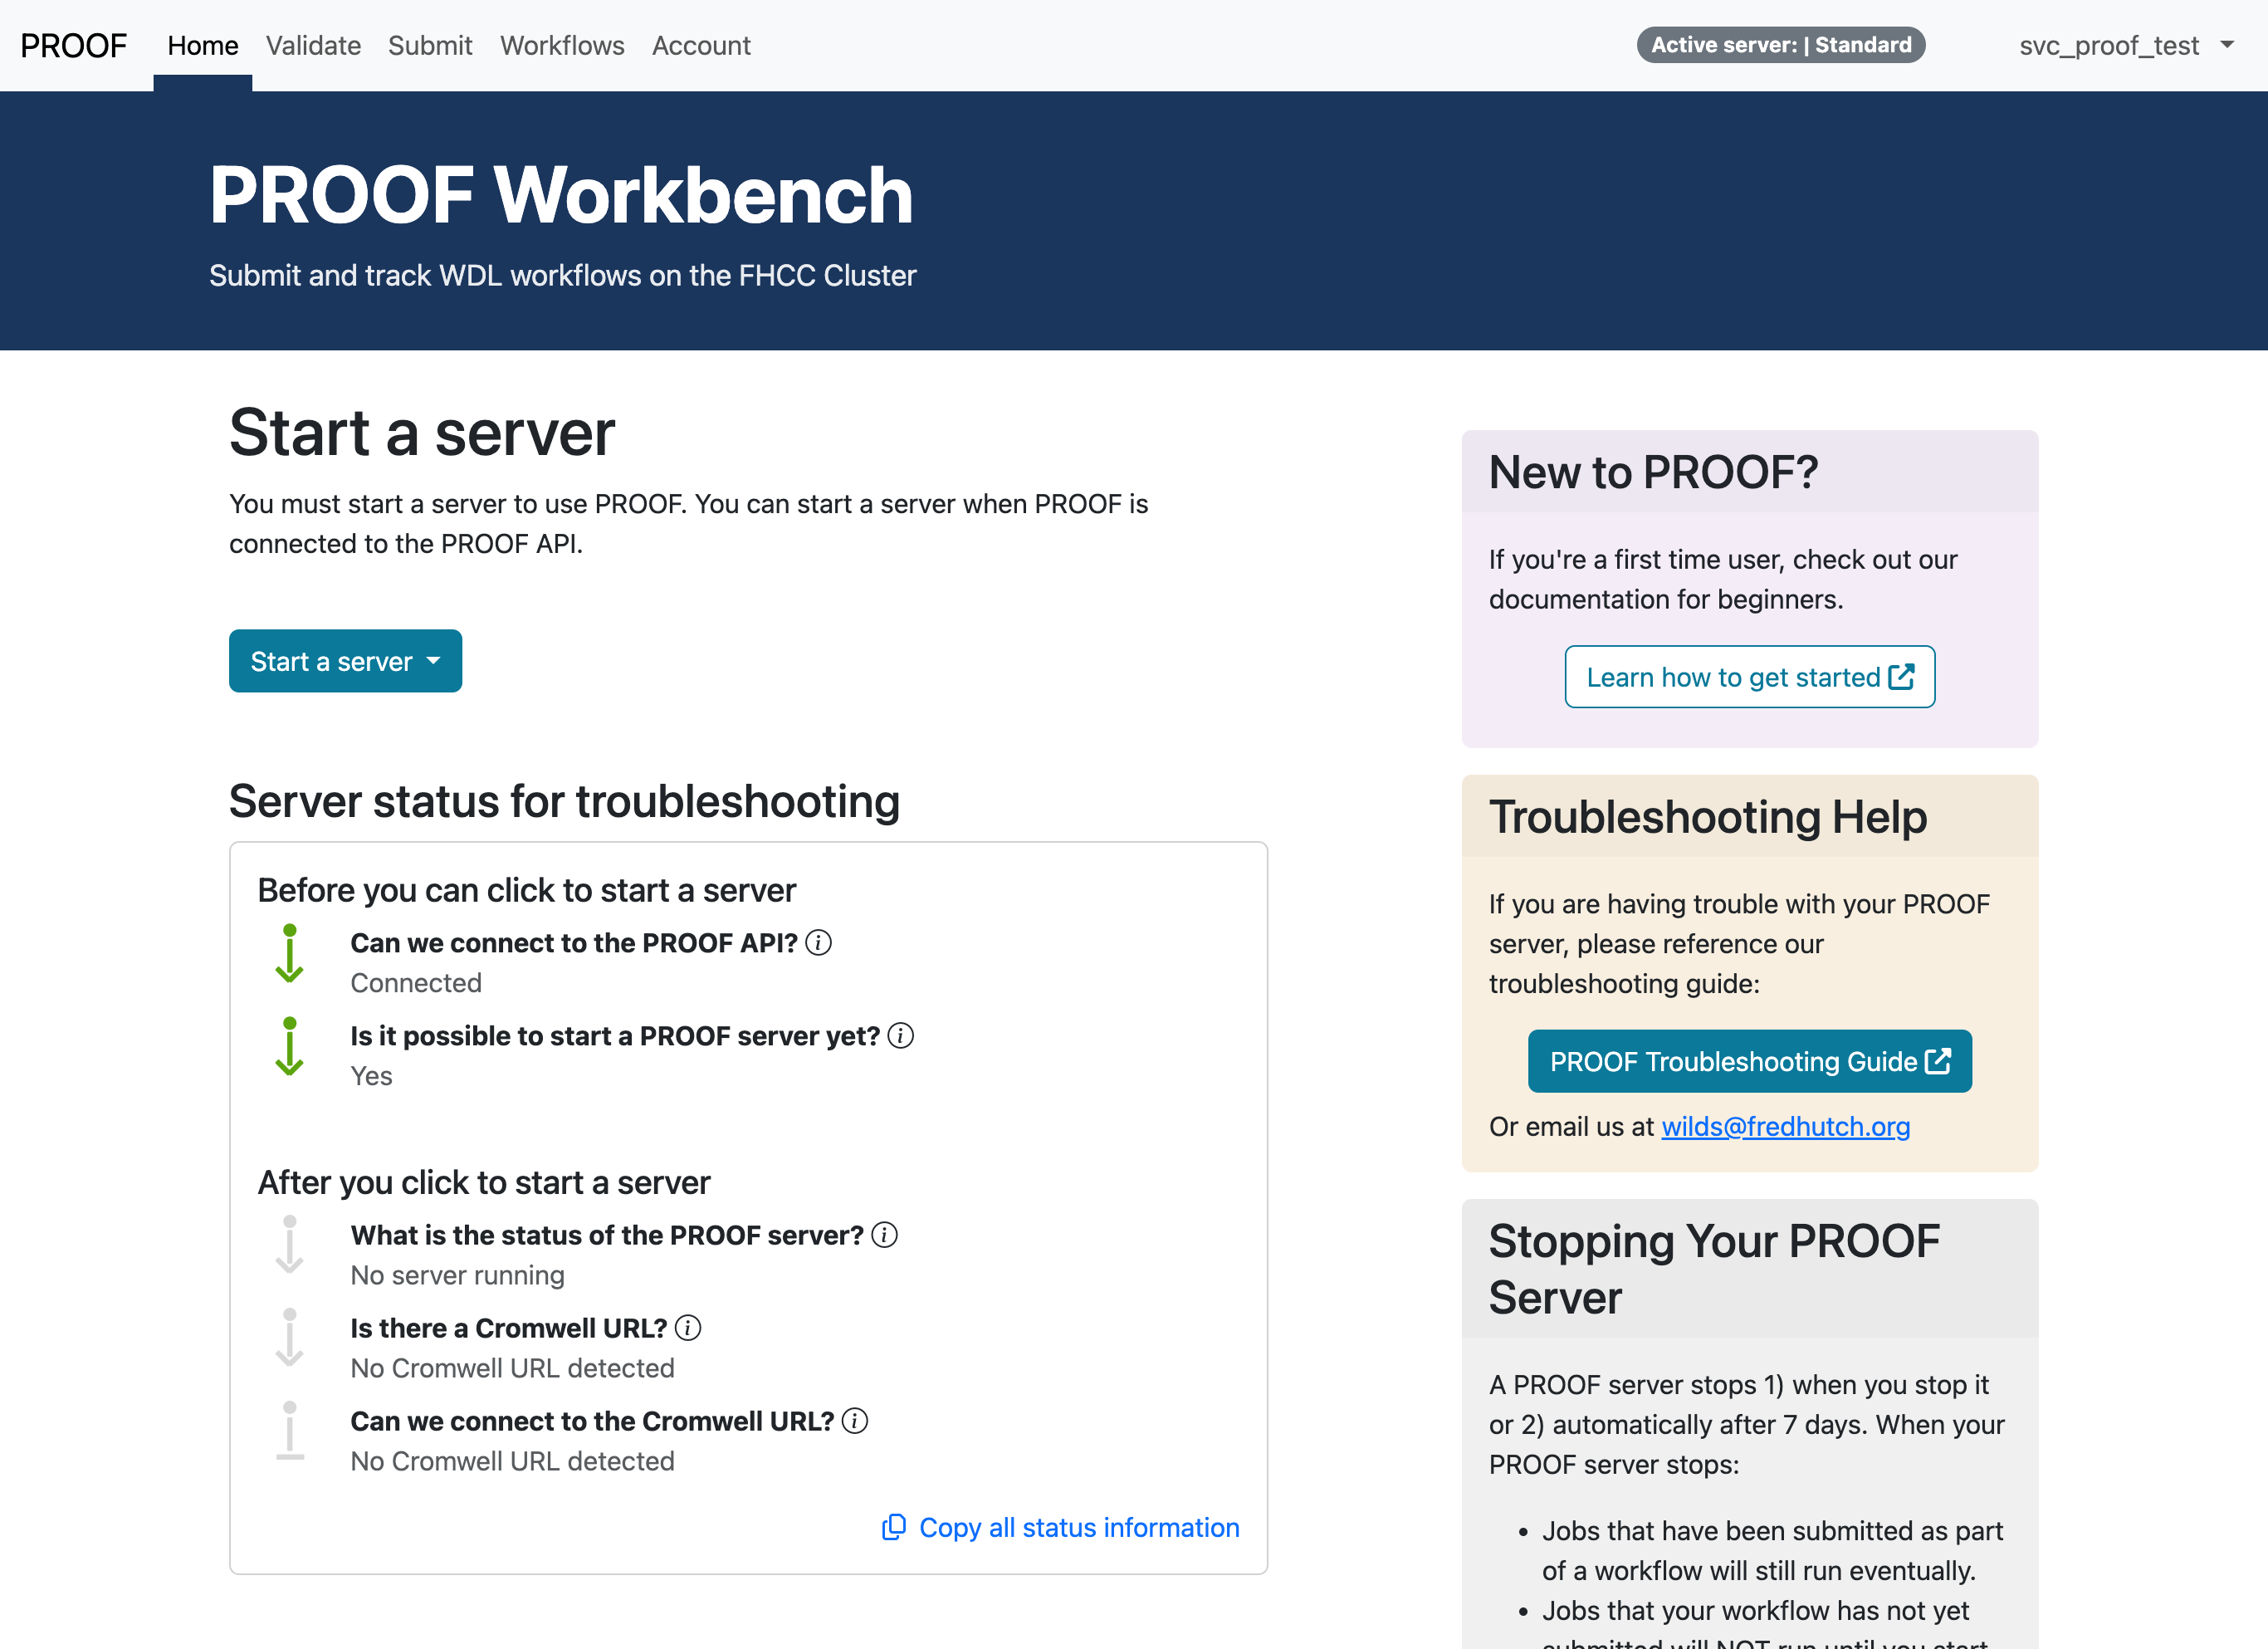
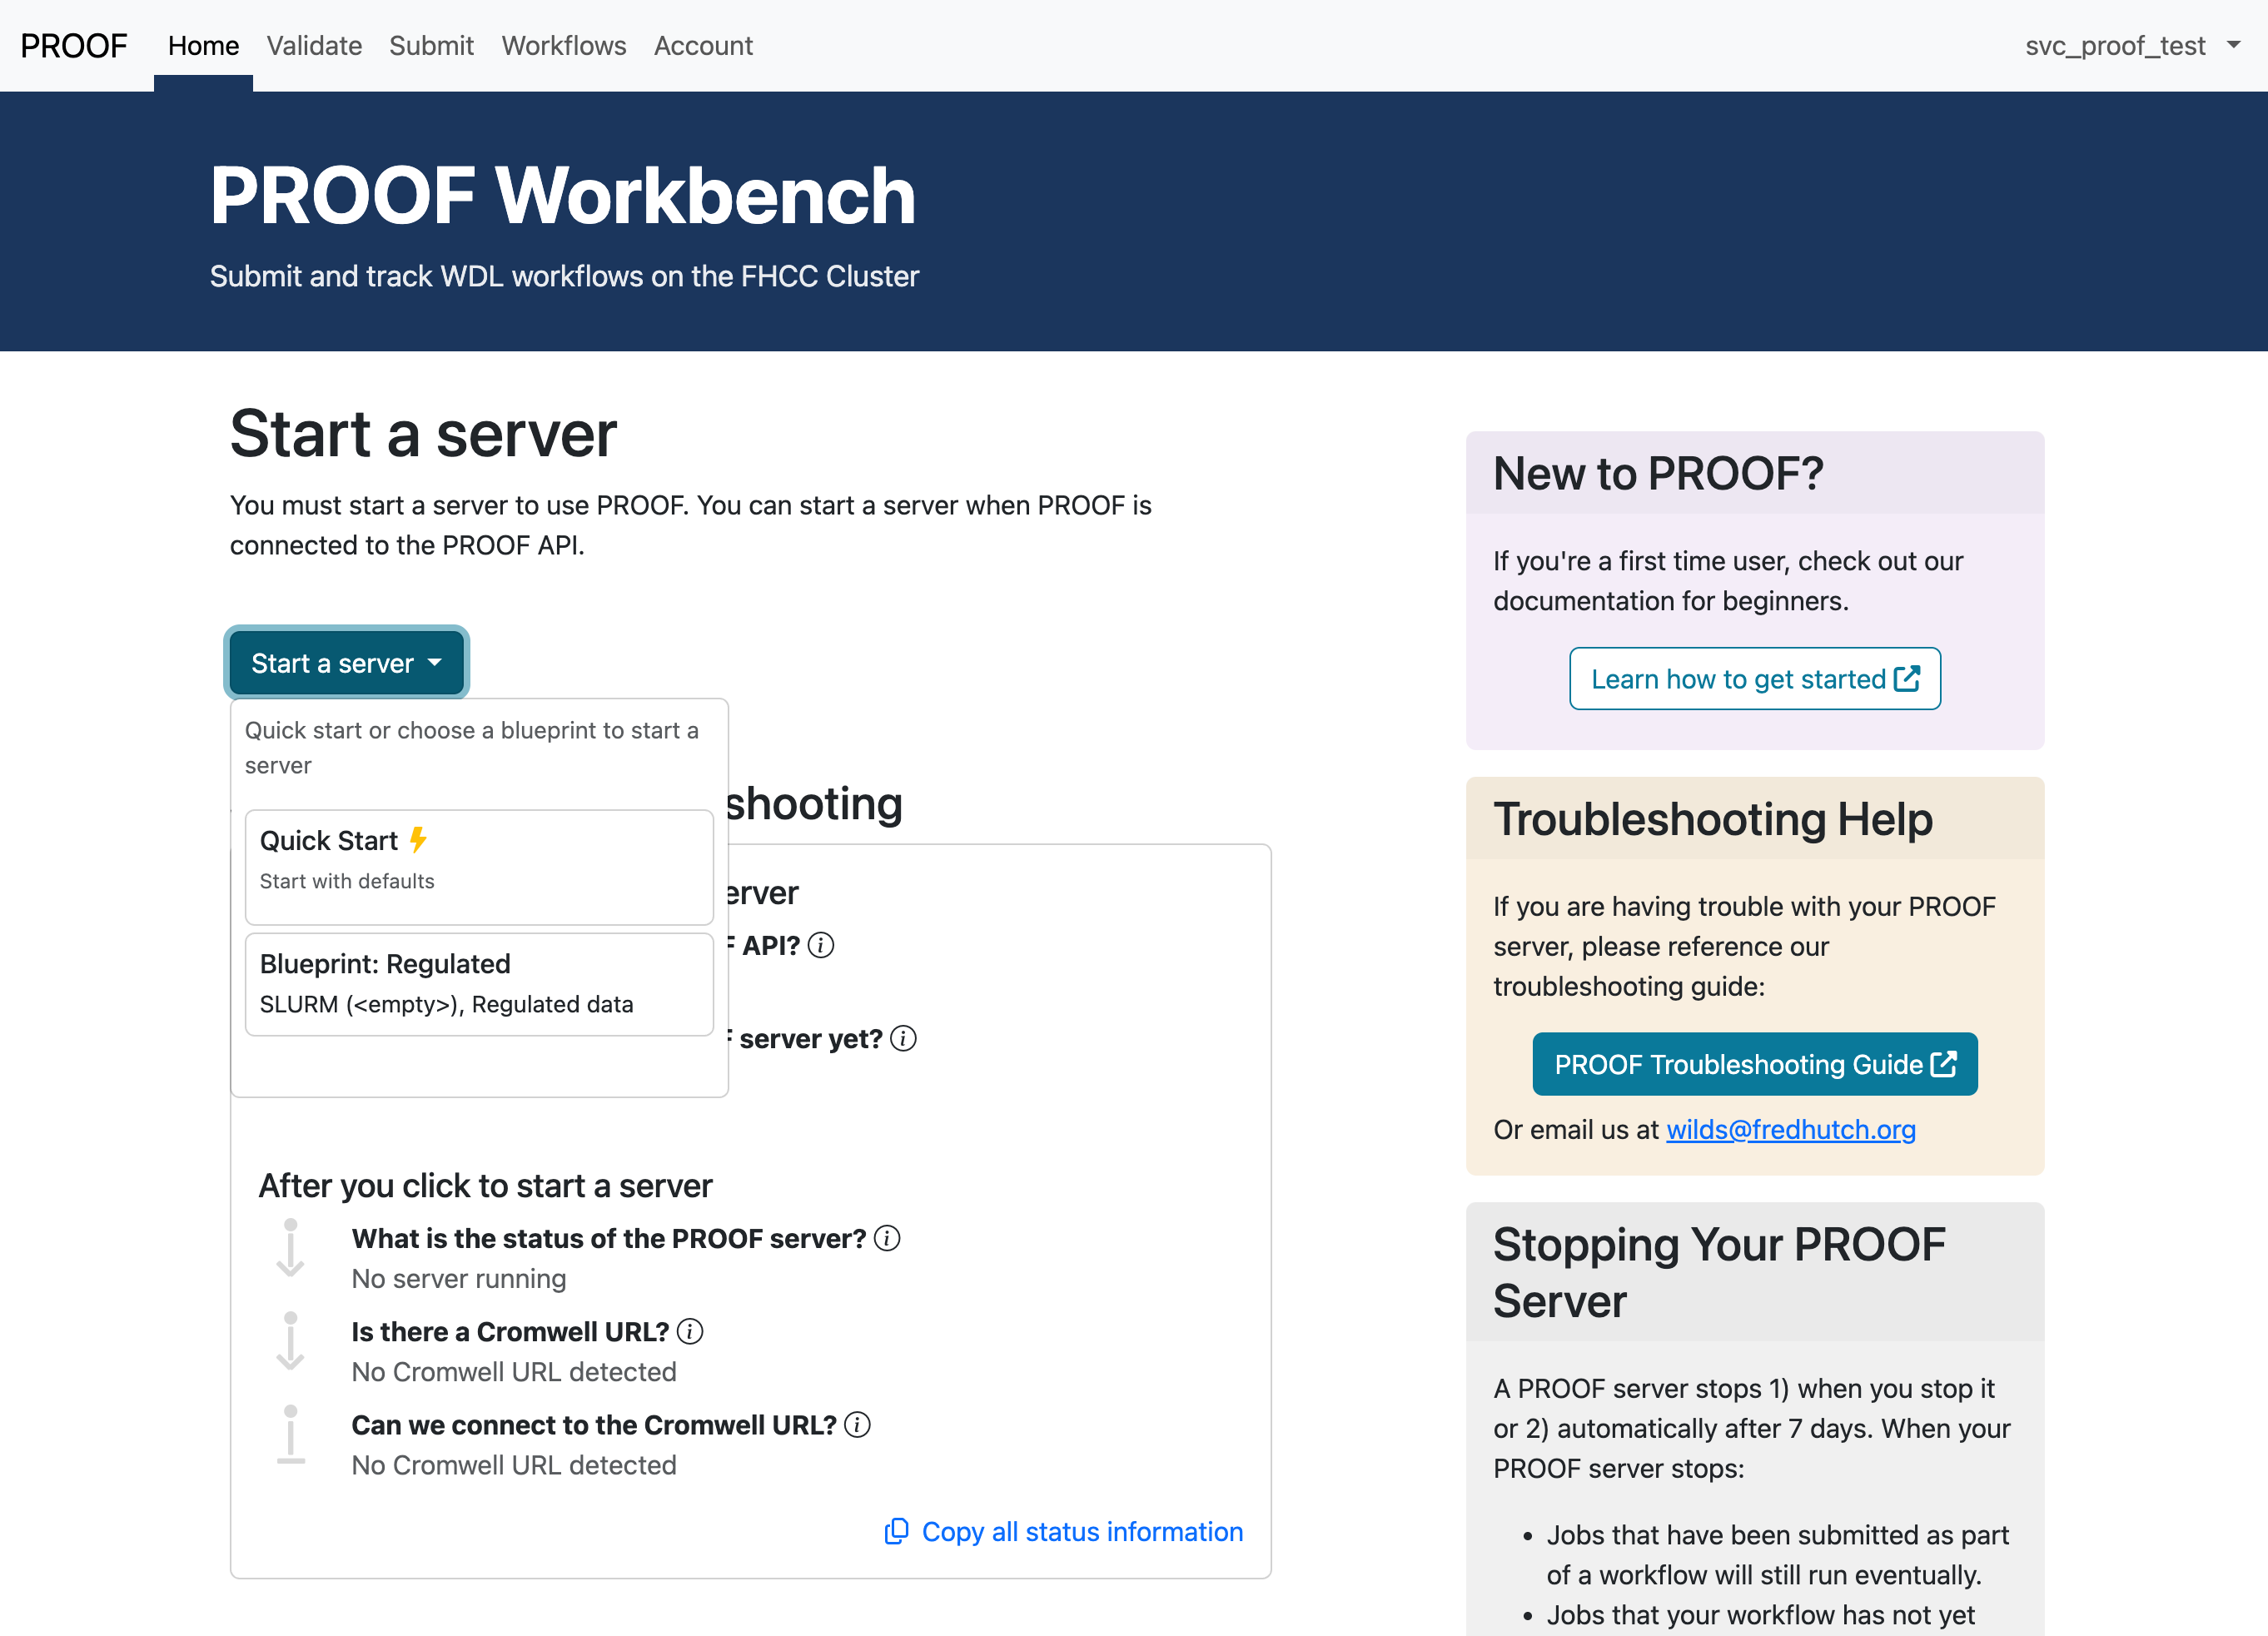
It may take a minute or two for the application to connect to the PROOF API. When you see the two green arrows, you can start a PROOF server. Click the Start a server button.
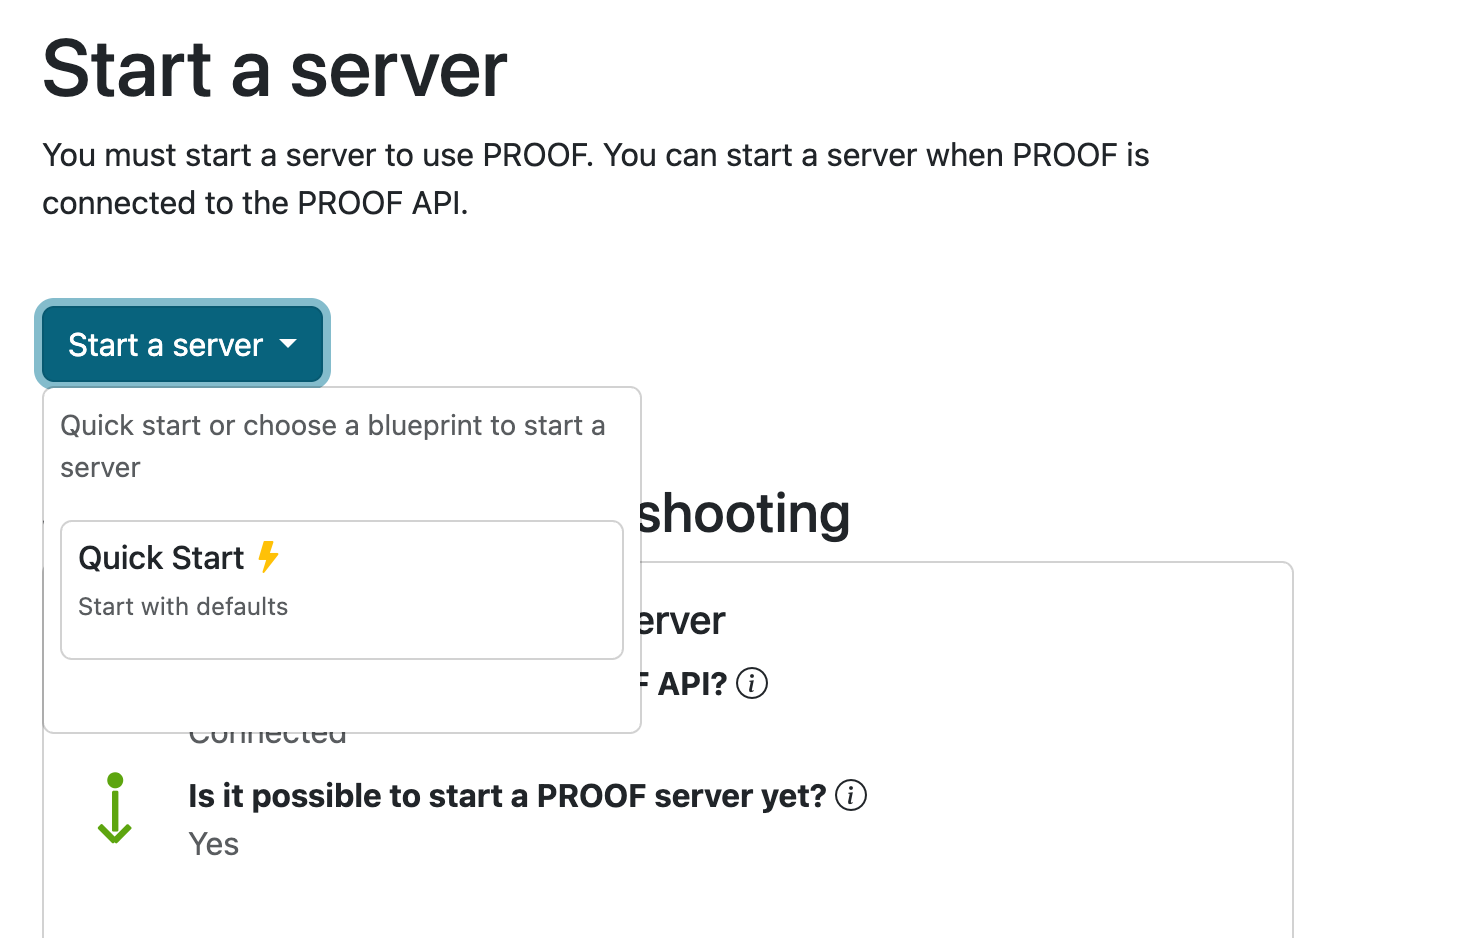
Now click Quick Start to start a PROOF server in the default configuration.
You will know your PROOF server has started when you see all green arrows. You should also receive an email confirming that your PROOF server has started.

Validating a Workflow
Before submitting a WDL, it is important to validate the workflow to ensure it is free from several types of syntax and implementation errors. WDL validation increases the likelihood the WDL will run as expected. This can be done using the Validate page in PROOF Workbench.
Let’s validate our first WDL. Click here to download a collection of WDL files that you can validate and run on PROOF Workbench. Unzip the downloaded file, and make note of where you have saved these files on your computer.
- On the Validate page, click Choose File under Upload WDL File and
navigate to the
simple-workflowfolder in the unzipped folder you downloaded. Selecthello.wdl. - Now click Choose File under Upload Consolidated Input JSON and
select the
input.jsonfile in the same folder ashello.wdl. - Click Validate, and a message should appear indicating that this WDL has been validated.
Submitting a Workflow
Submitting a WDL to be run on the Fred Hutch cluster is a similar process to submitting a WDL for validation. Start by going to the Submit page on PROOF Workbench. We are going to be using the same WDL file that we downloaded in the previous section, so make sure to download and unzip that file if you haven’t had the chance.
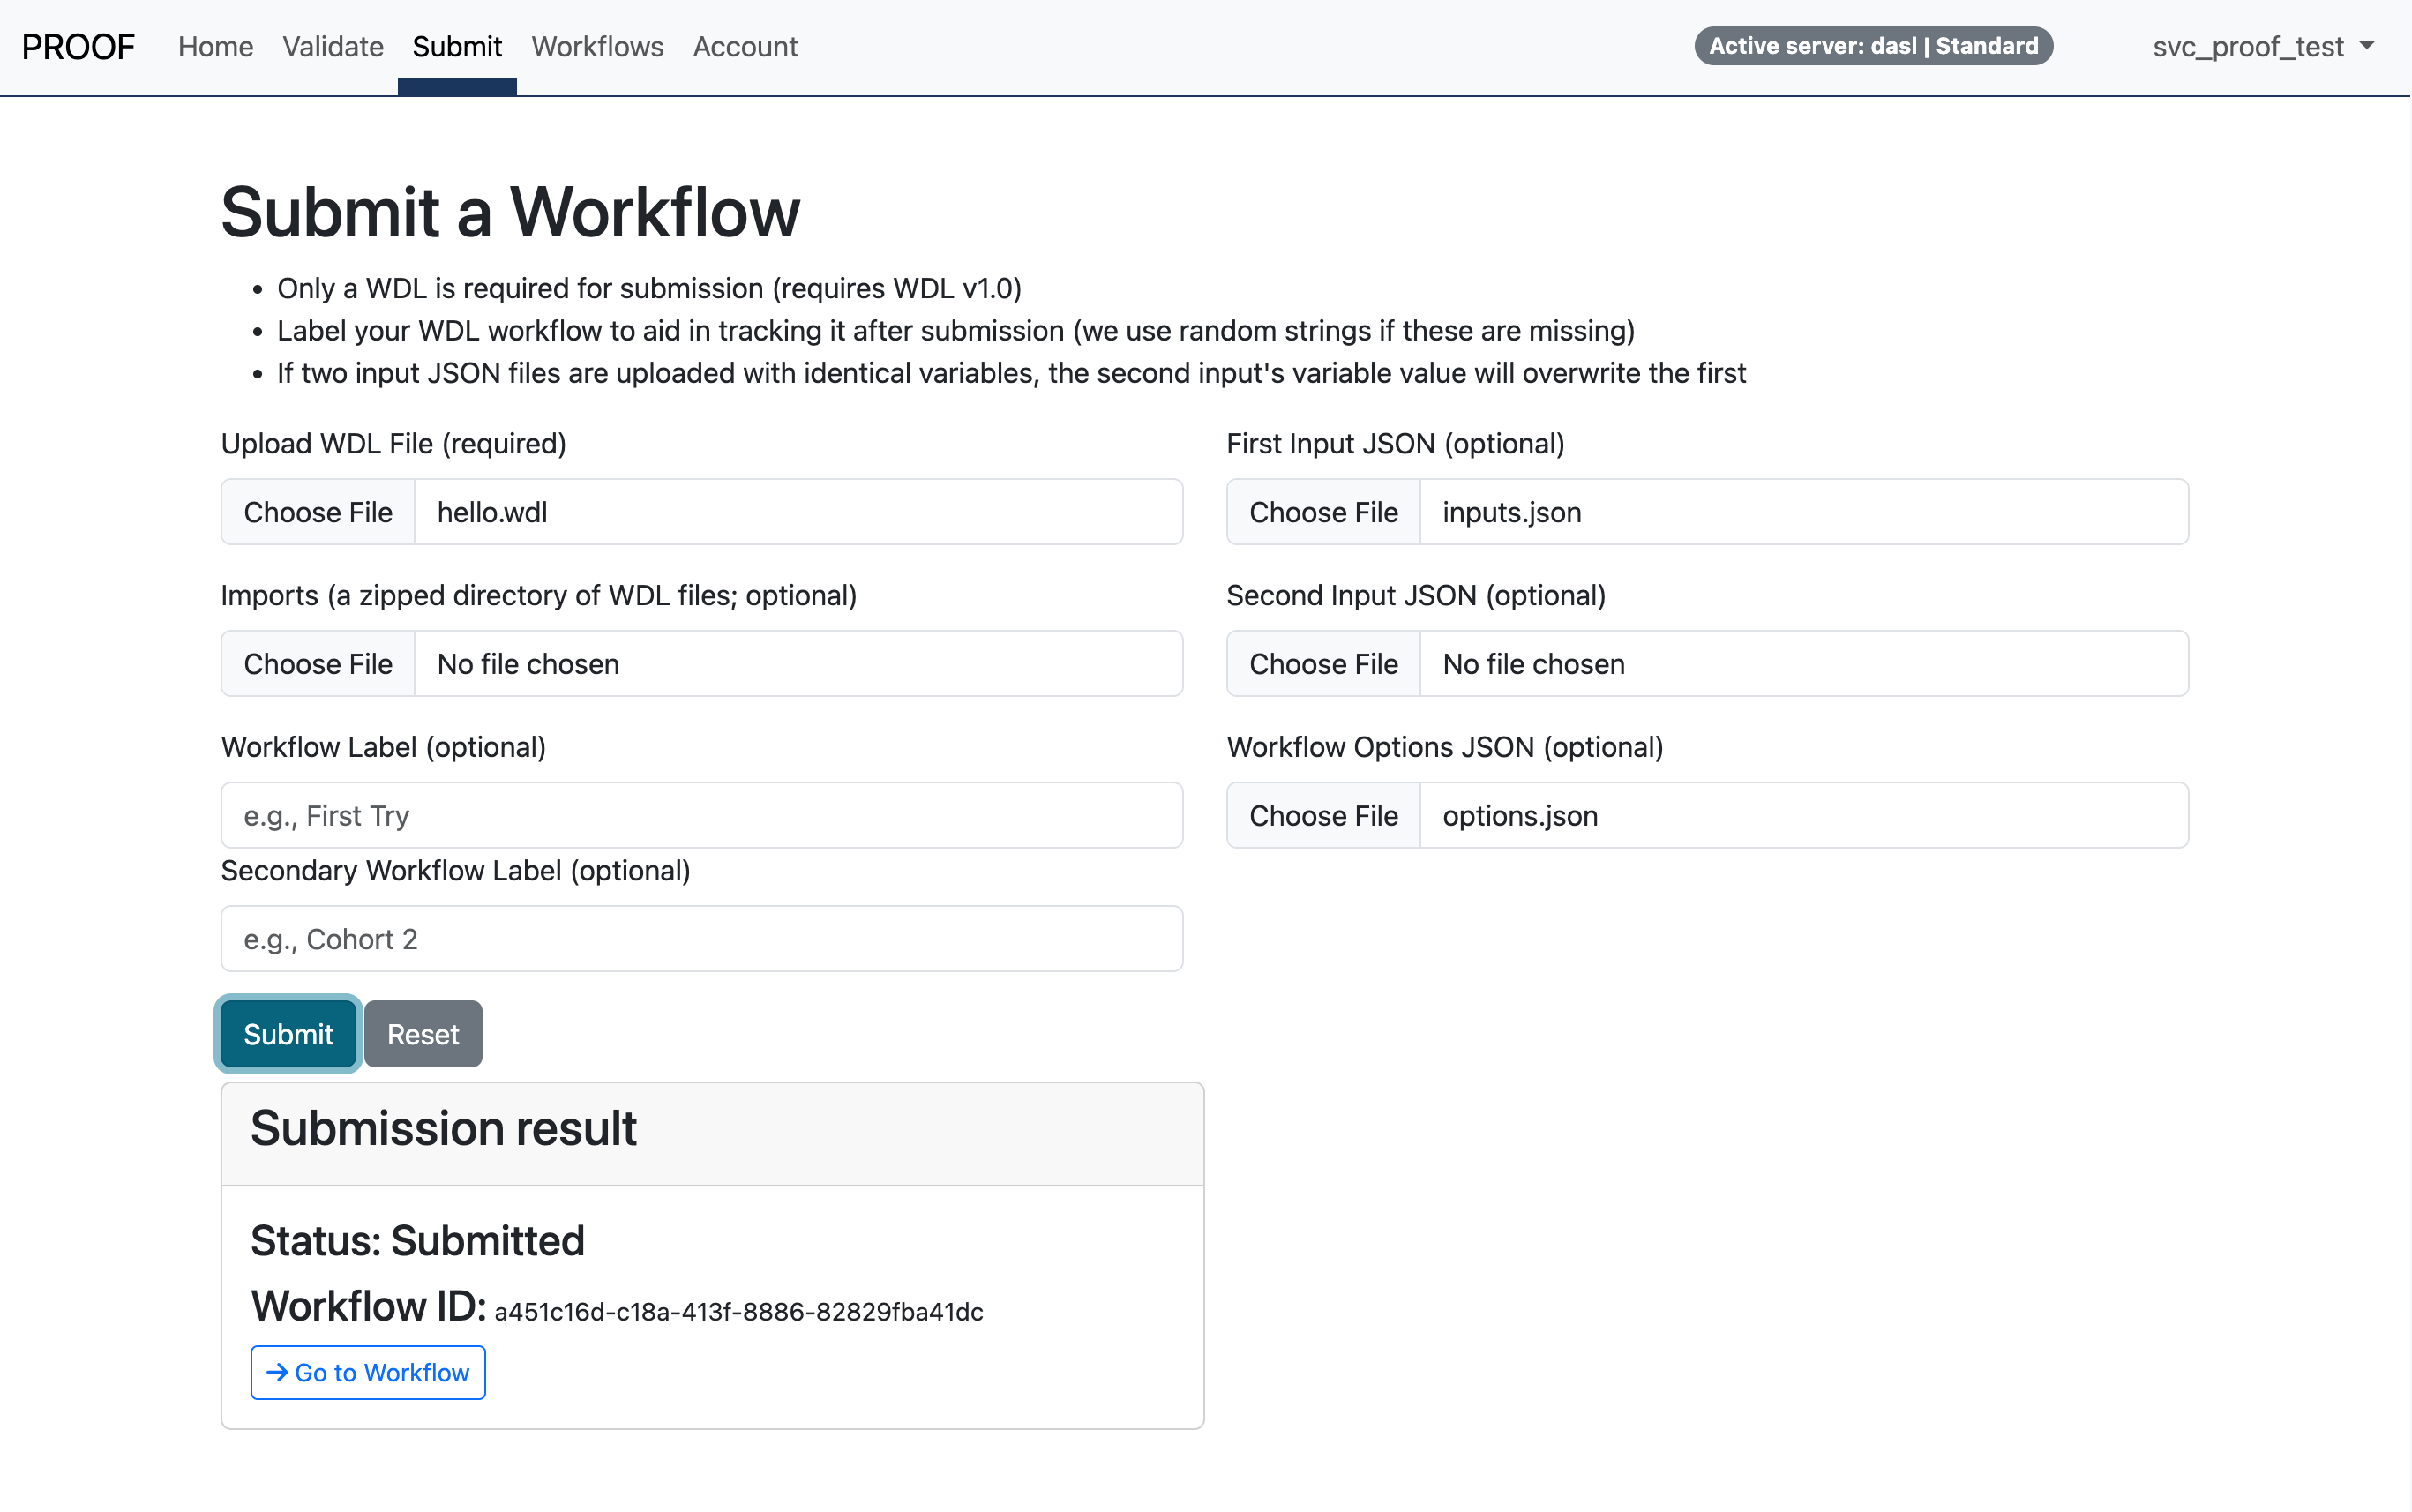
- Click Choose File under Upload WDL File and navigate to the
simple-workflowfolder in the unzipped folder you downloaded. Selecthello.wdl. - Click Choose File under First Input JSON and select the
input.jsonfile in the same folder ashello.wdl. - Click Choose File under Workflow Options JSON and select the
options.jsonfile in the same folder ashello.wdl. - Click Submit. Shortly you should see a message appear below the submit button, including a button that says Go to Workflow. Click that button and well done submitting your first workflow.
Tracking Workflows
After clicking the Go to Workflow button on the Submit page, you should see a page like the one pictured below, containing all of the details of your running workflow.
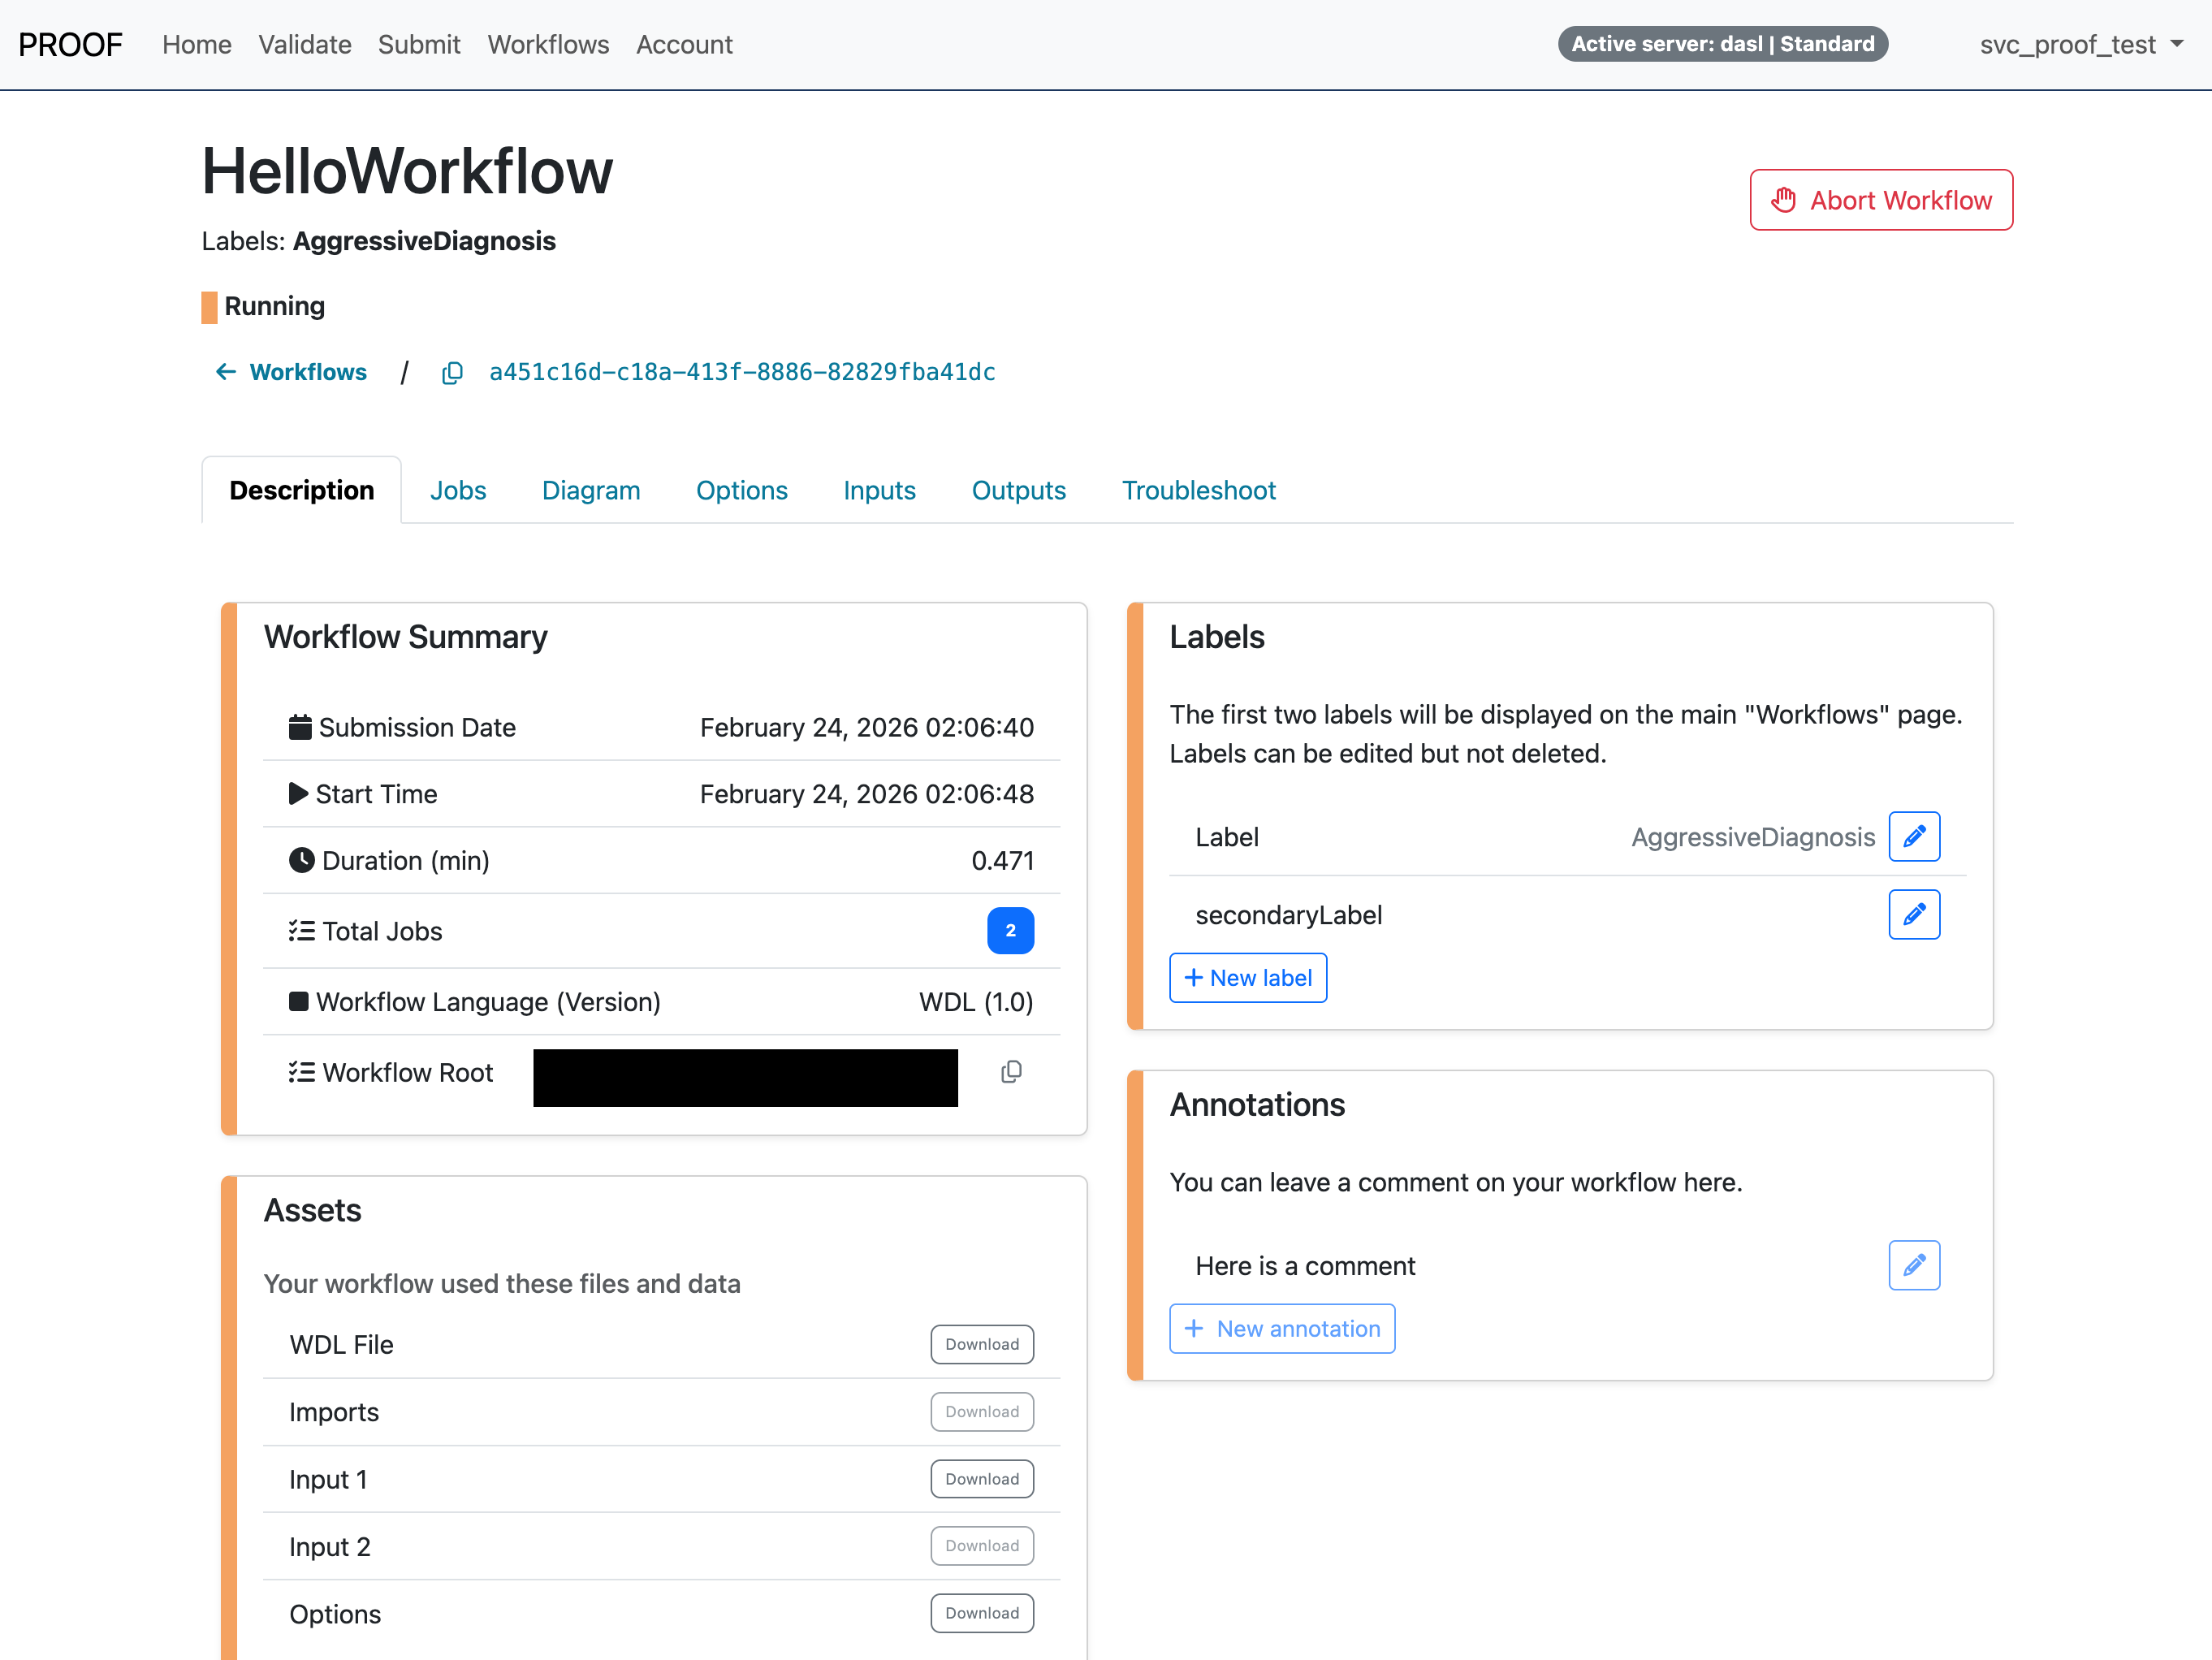
After a few minutes, your workflow should complete its run, in which case the status of the workflow will change from Running to Succeeded.
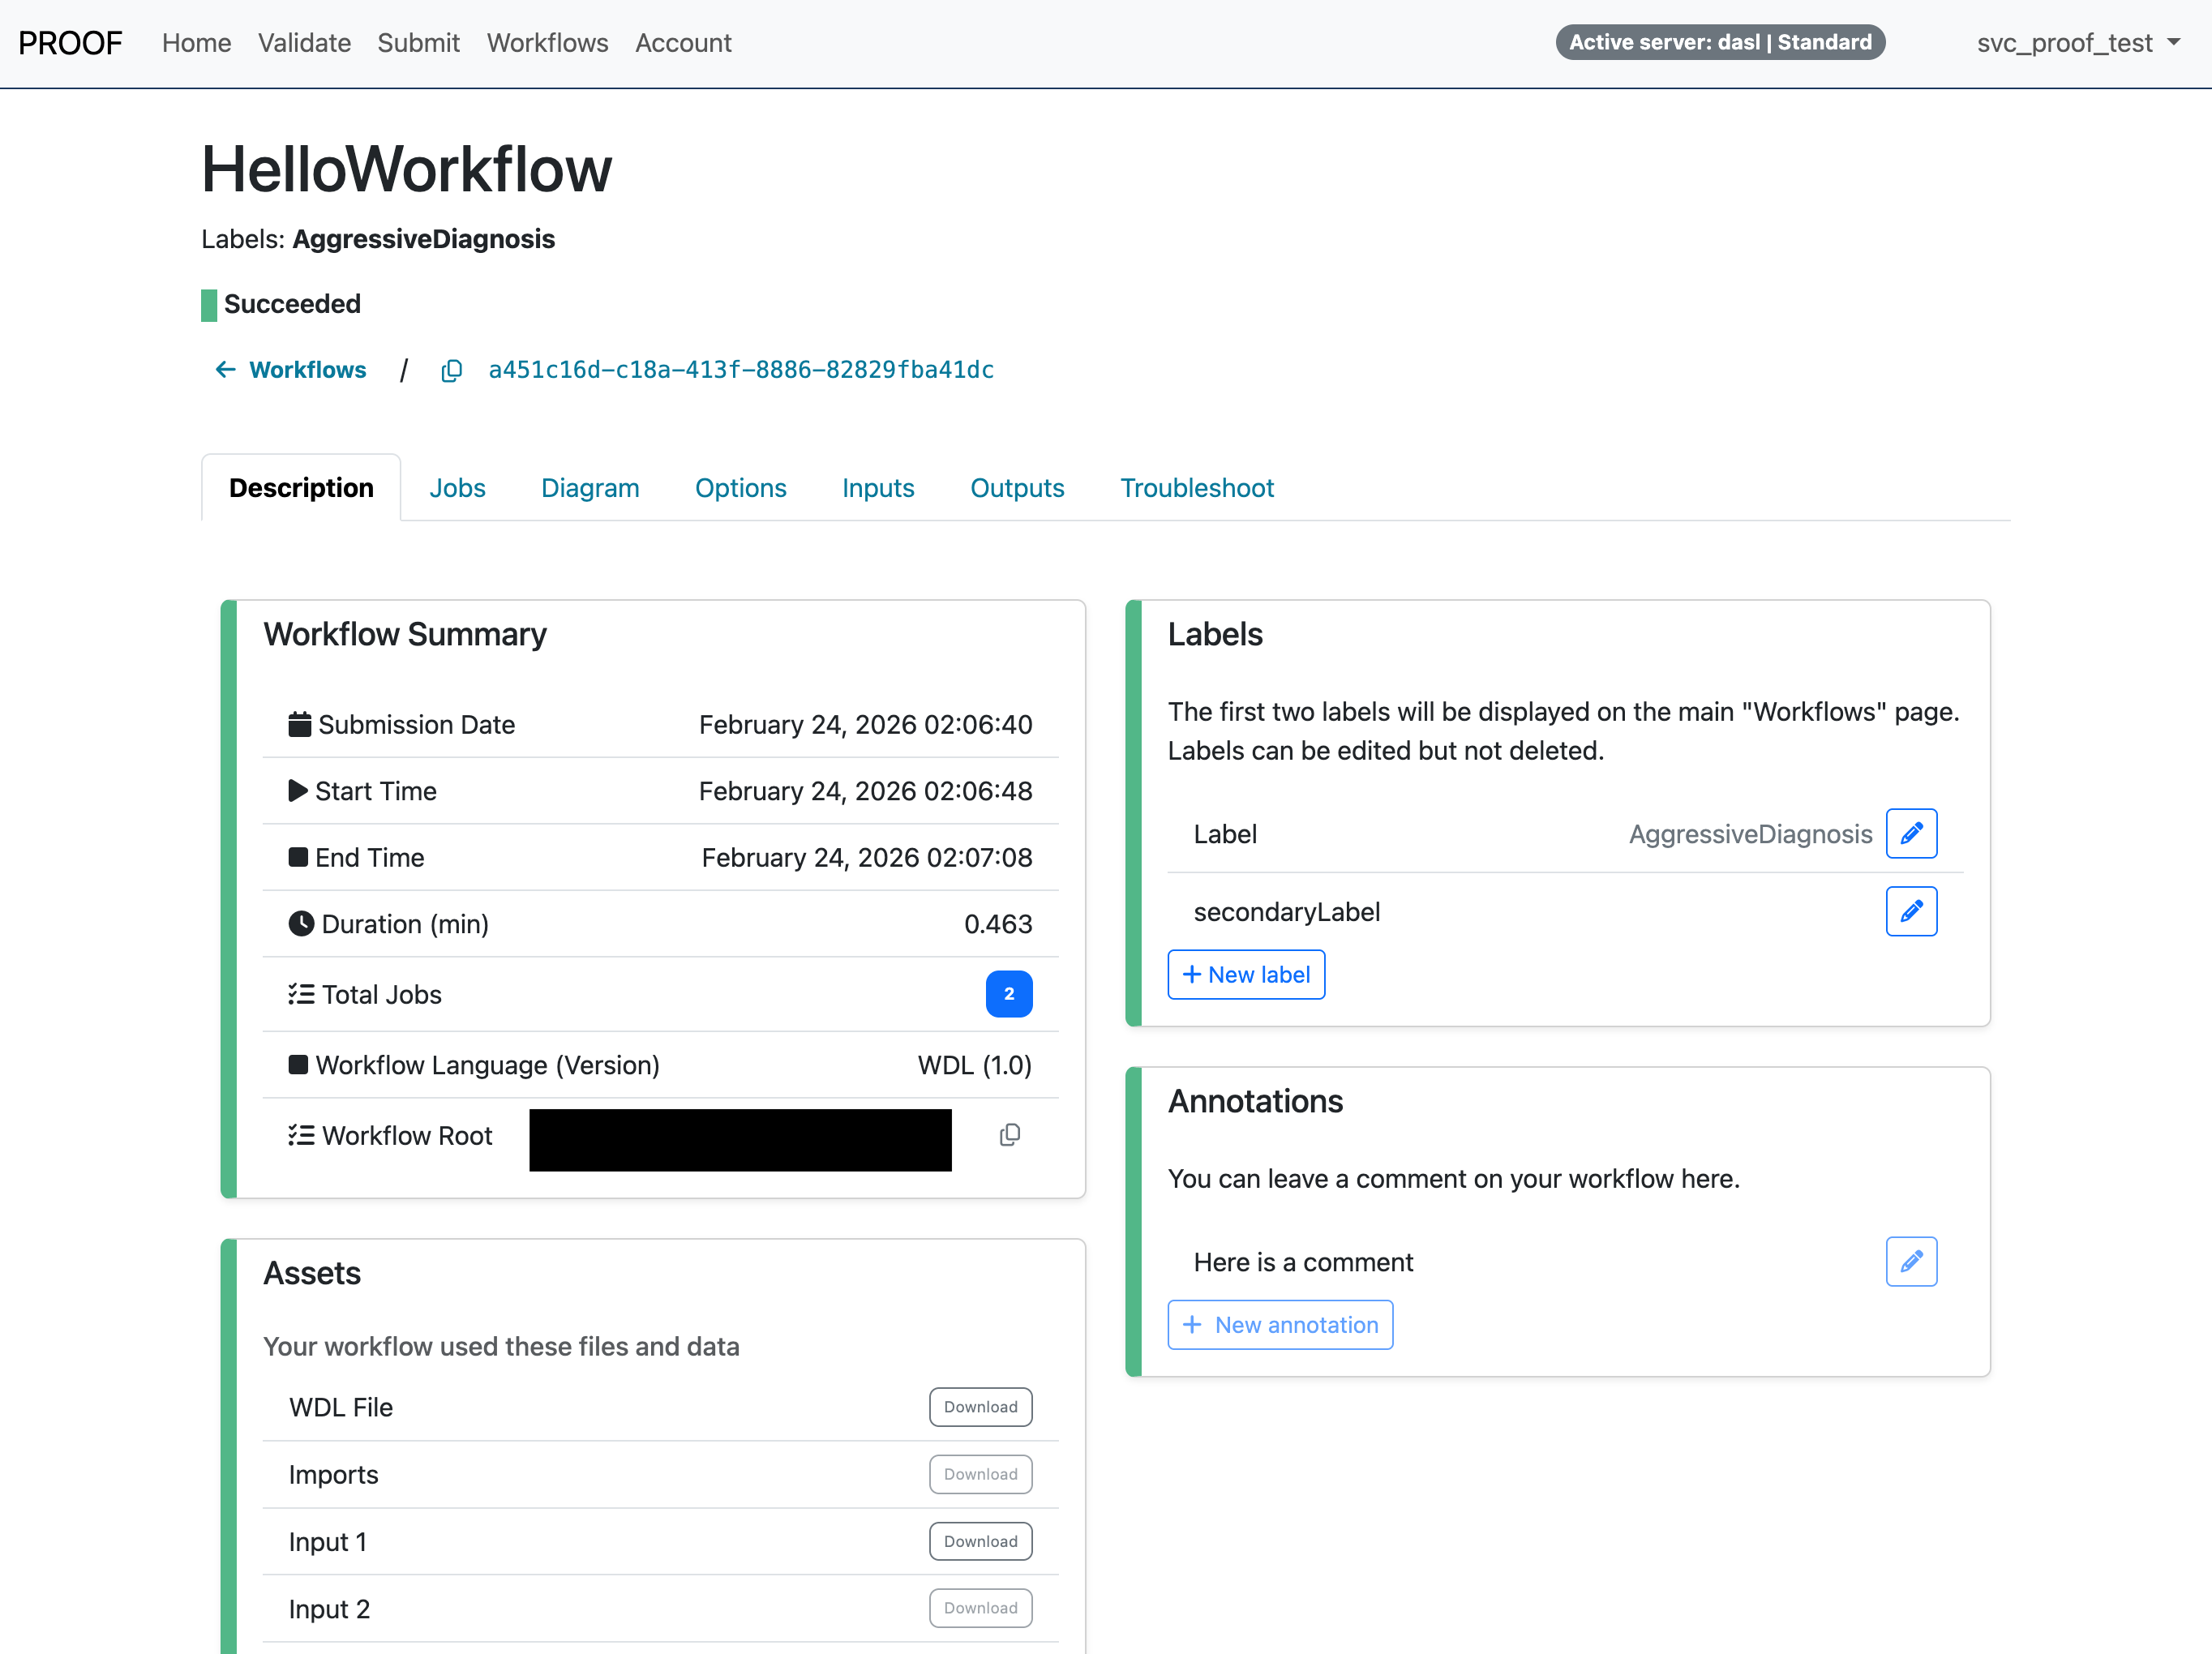
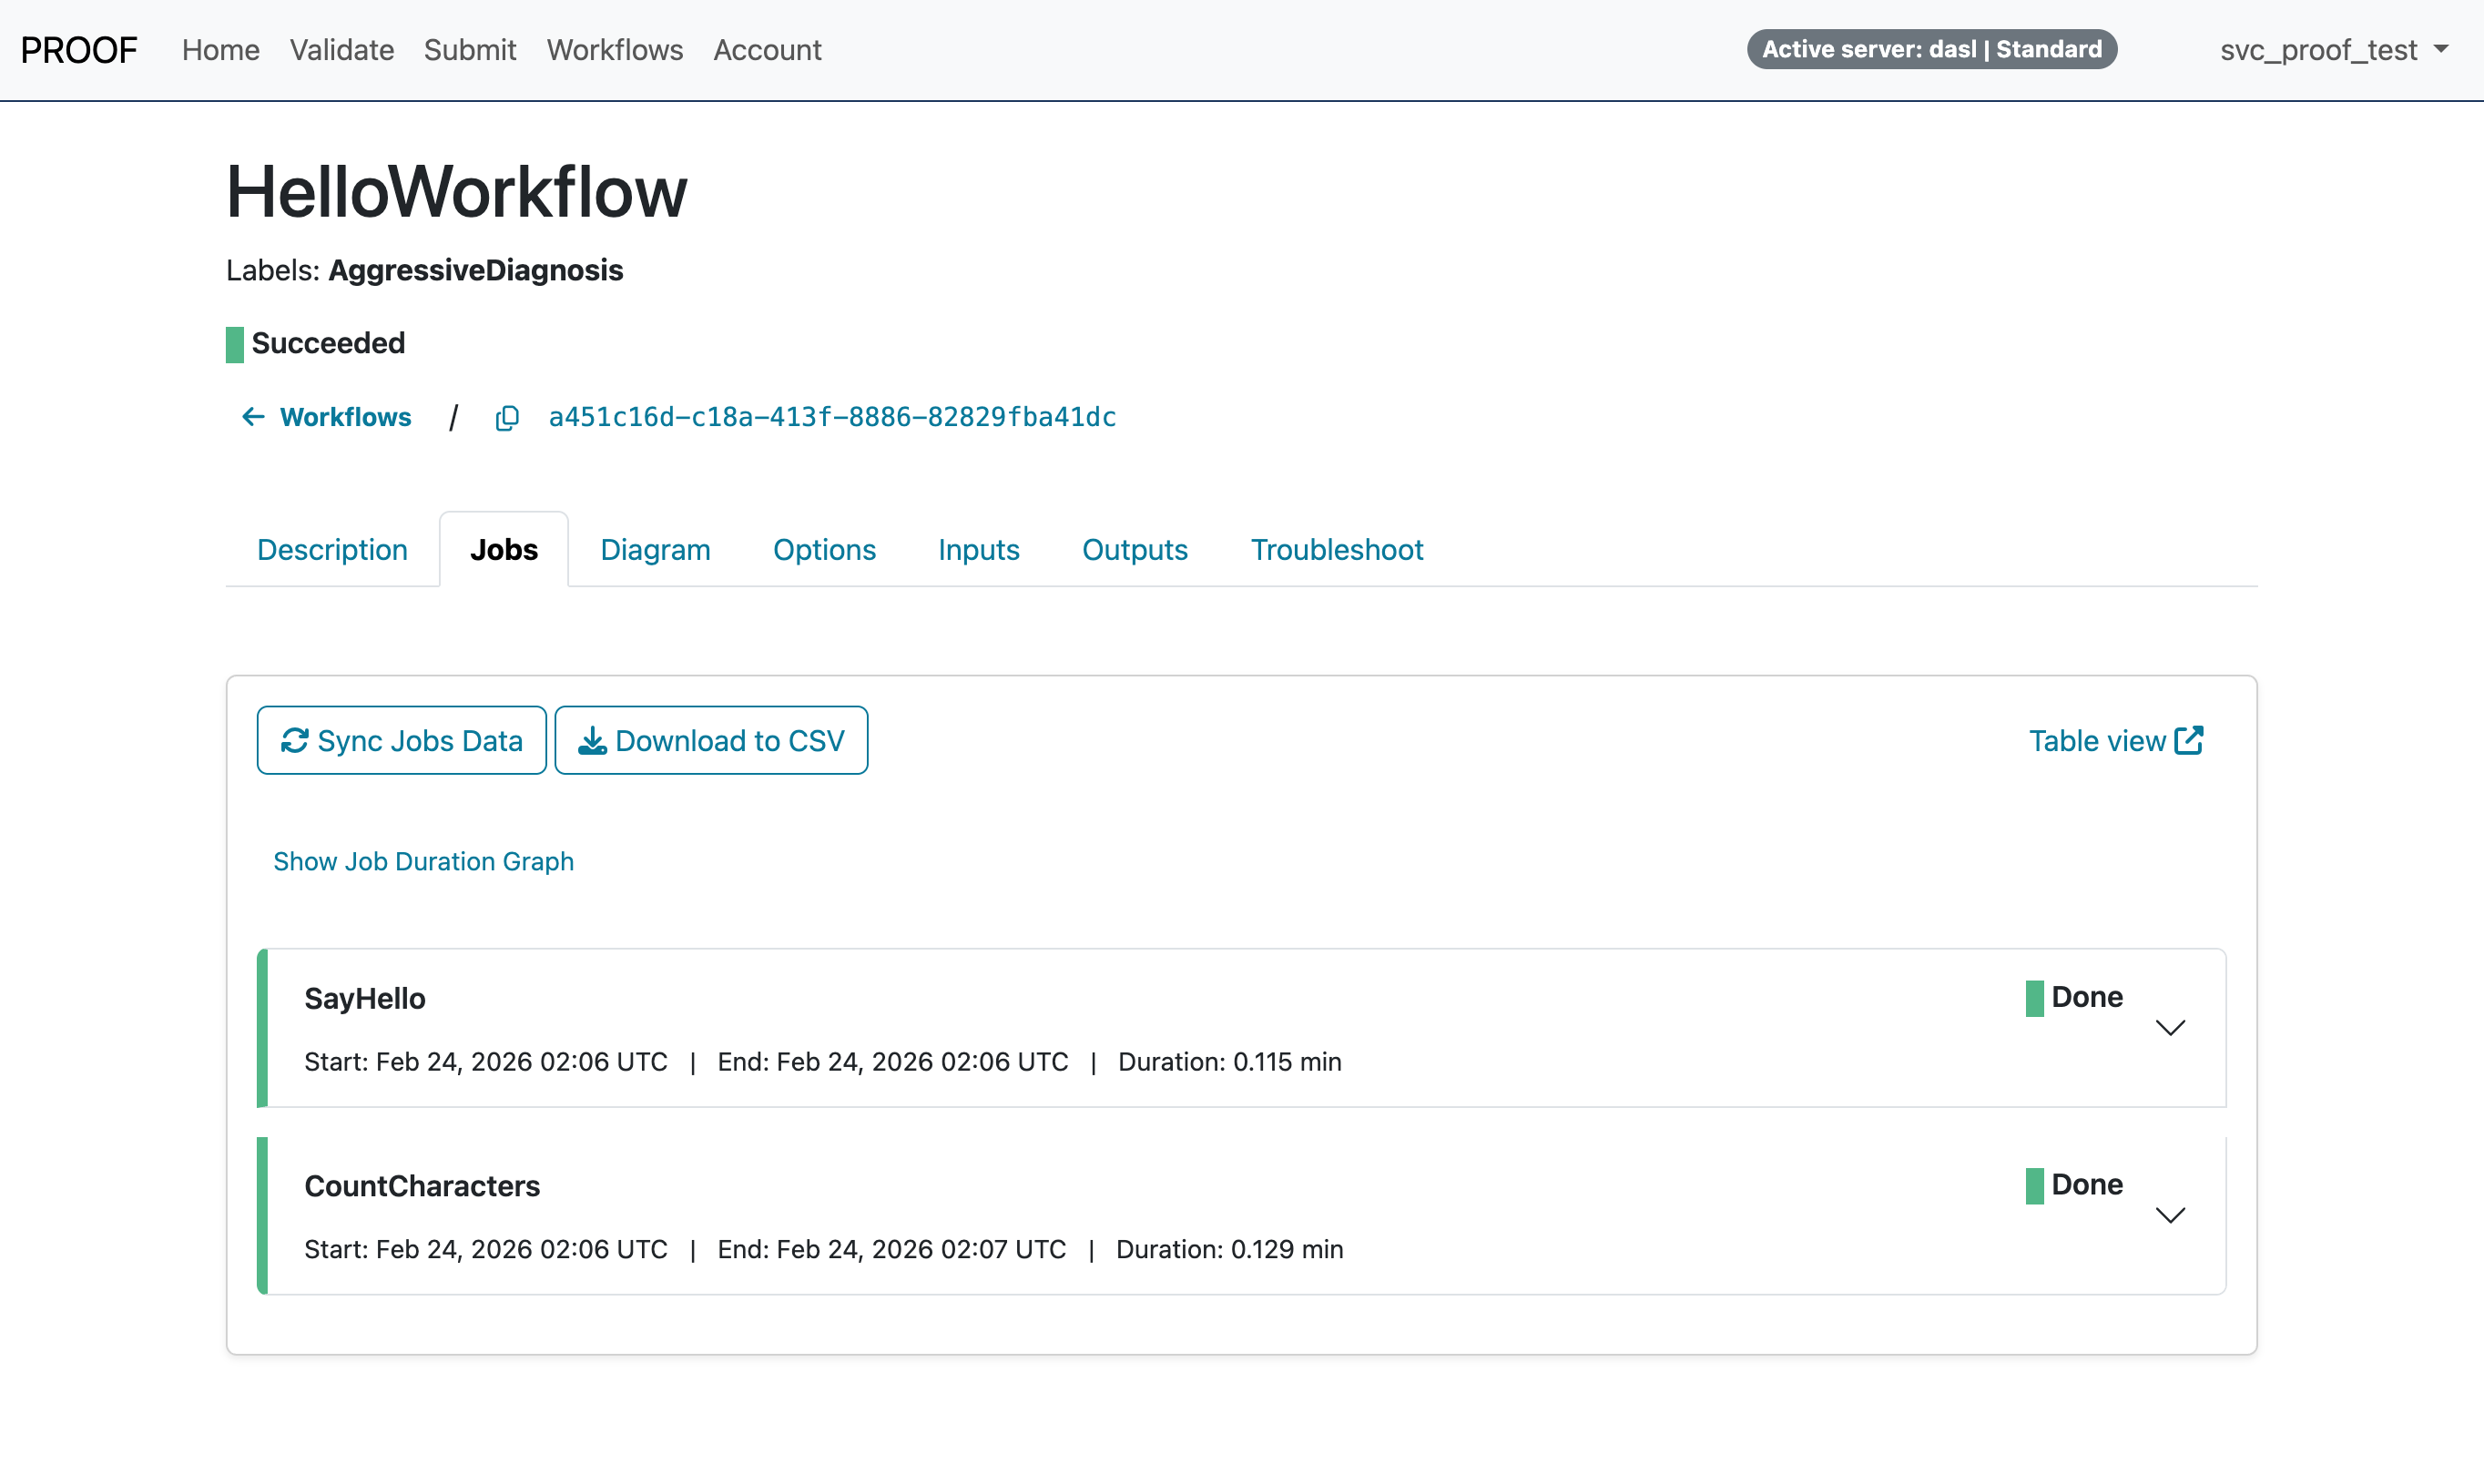
Click on the Jobs tab on the page for this workflow to see the details about the individual jobs that were run as specified in the workflow.
Take care to explore the other tabs on the page, especially Diagram to see your WDL visualized.
Once you have explored the details of your completed workflow, click on the Workflows page to see an overall view of the all of the workflows you have run with PROOF.
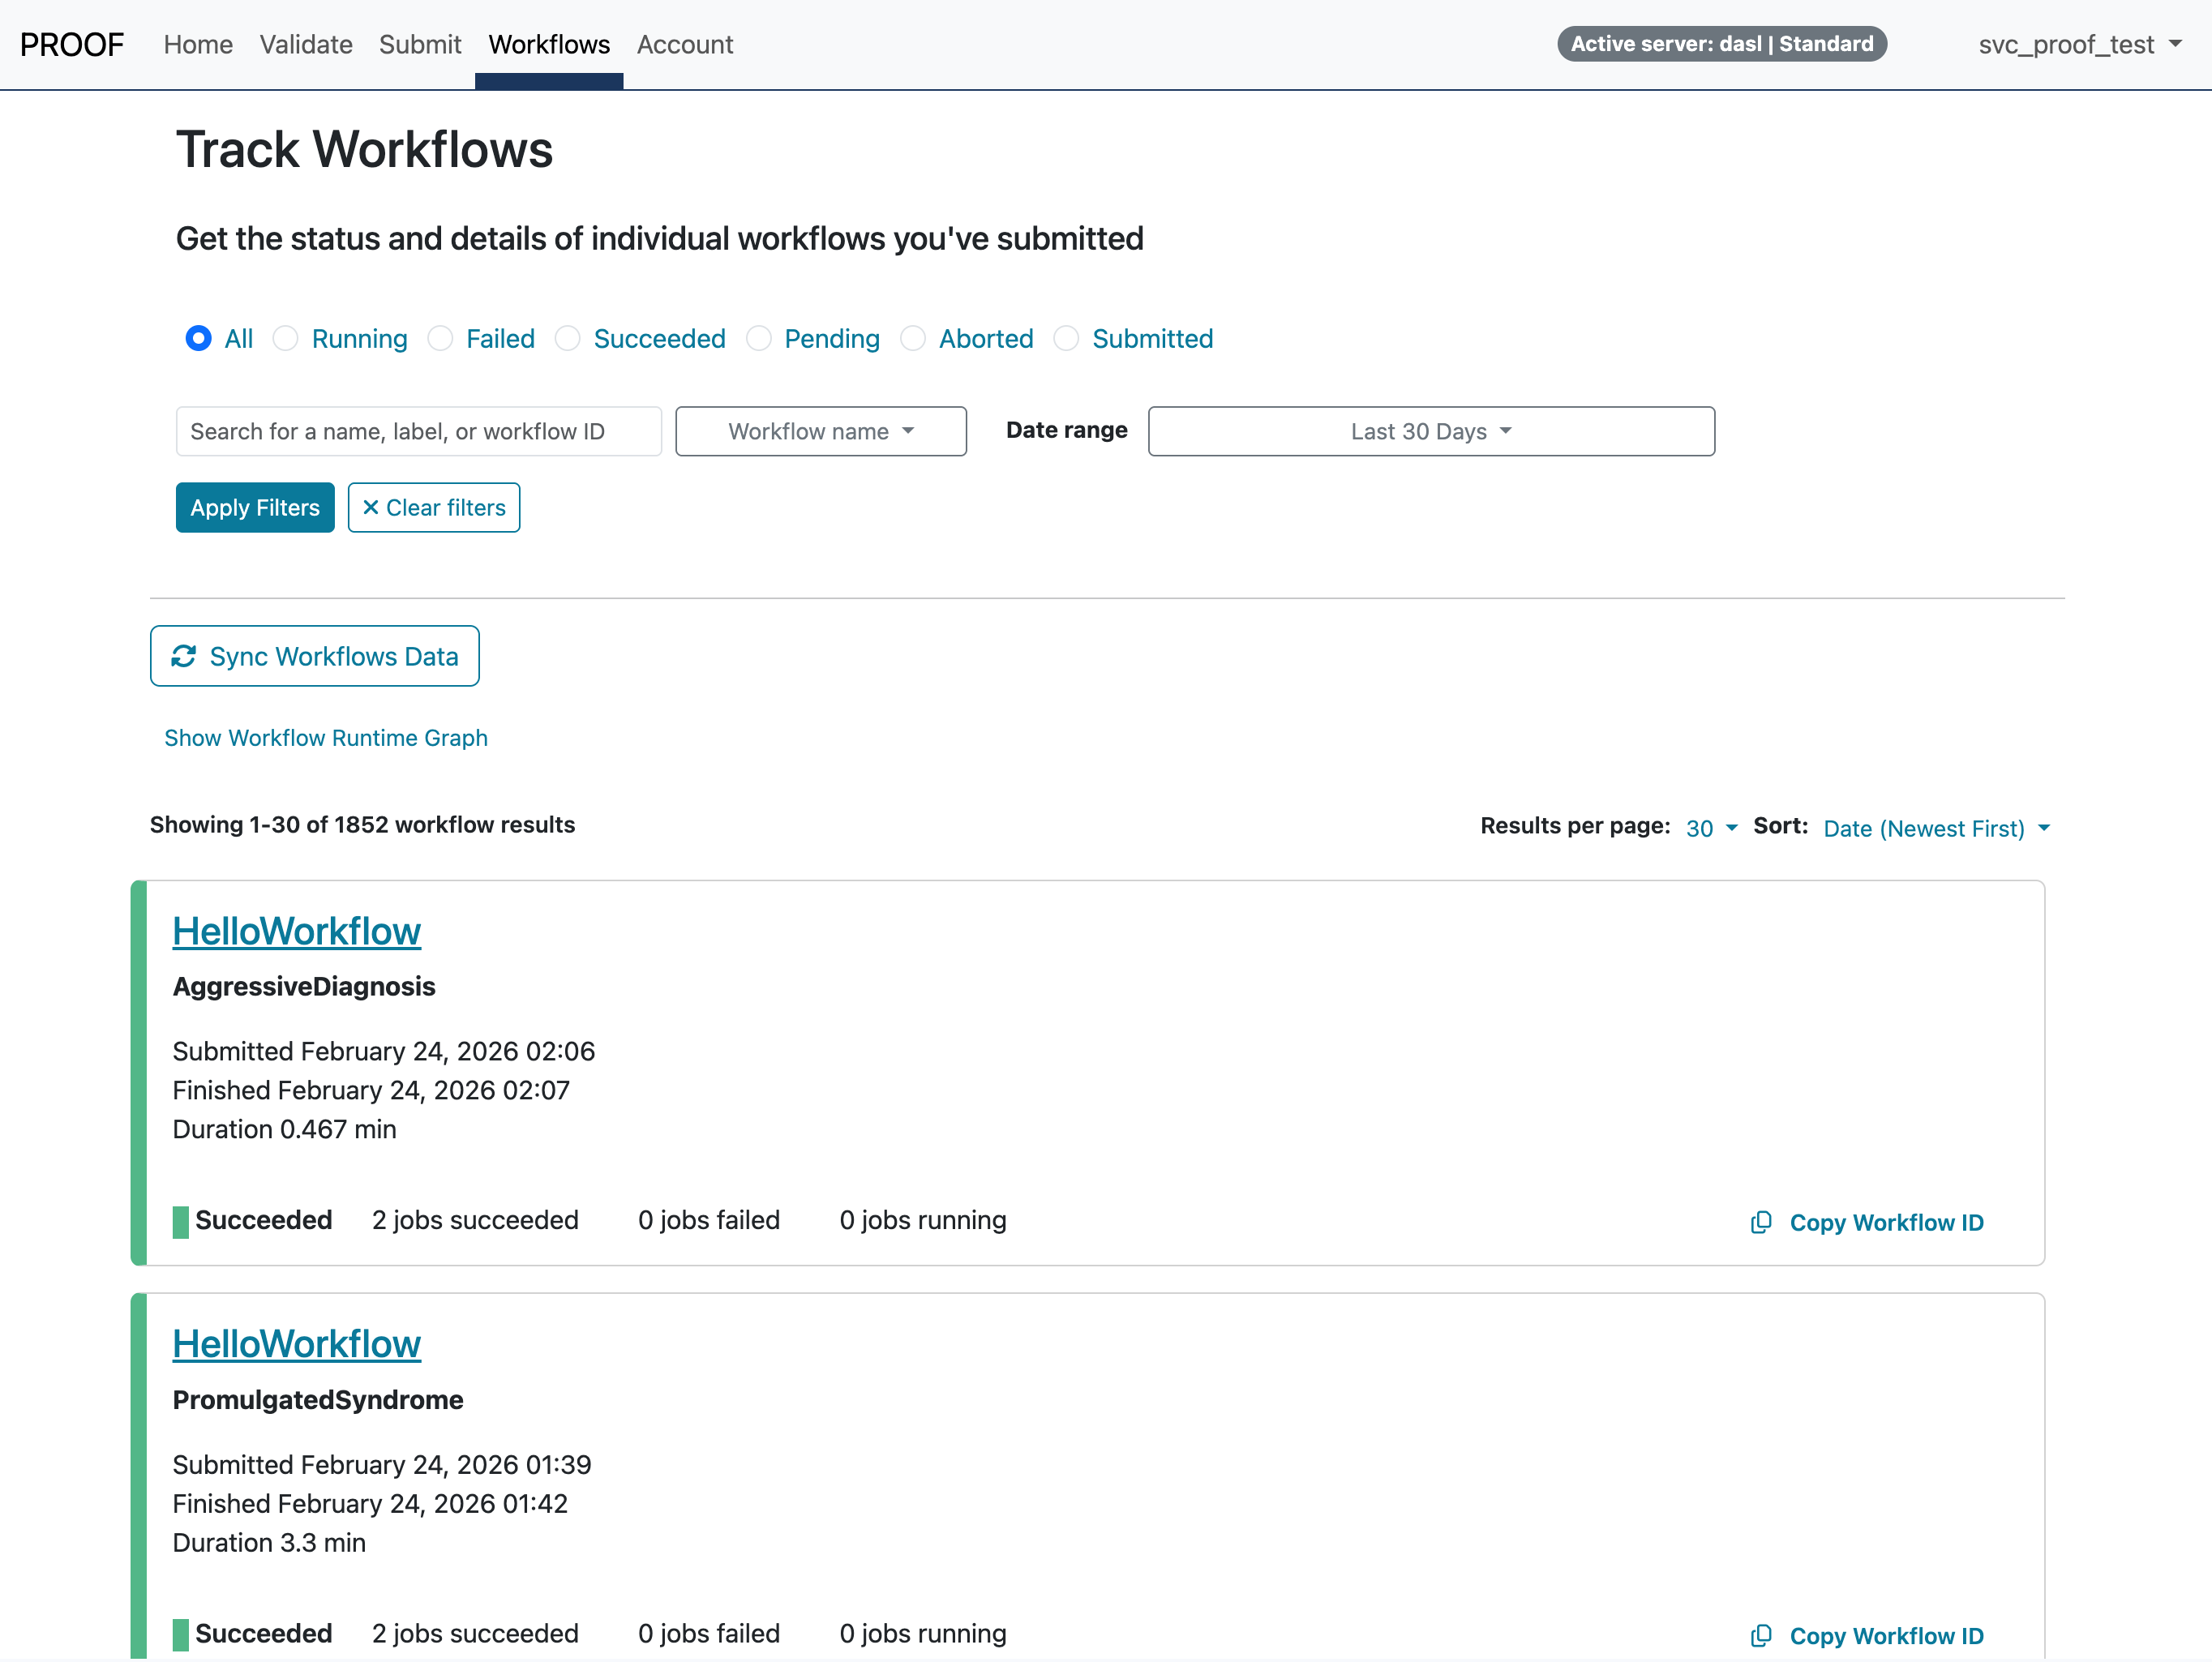
On this page you can navigate between multiple workflows that may be running simultaneously, you can filter workflows based on their status, and you can search for workflows based on the workflow name, the workflow ID, or labels that you have assigned to the workflow.
Stopping a PROOF Server
Your PROOF server will stop automatically after seven days, or you can stop a PROOF server yourself. On the Home page, click Stop server and then Yes to confirm. Please consider the following before stopping a PROOF server:
- Jobs that have been submitted as part of a workflow will still run if they are queued on the cluster.
- Jobs that your workflow has not yet submitted will NOT run until you start your PROOF server again, using the same blueprint.
- To track previously submitted workflows and jobs, restart the PROOF server with the same blueprint you used when those workflows were submitted.
Understanding Blueprints and PROOF Servers
Blueprints are specifications for types of PROOF servers that you can start. You can start a PROOF server with the default settings by clicking the Quick Start option under the Start a server menu on the Home page. If you want to start a server with options other than the default, you will need to create a blueprint. With blueprints you can specify different attributes of a PROOF server:
- The Slurm account that you wish to use with PROOF. Every cluster user automatically has a default Slurm account, however you might need to use a specific, non-default Slurm account if you work with multiple PIs, if you need to access different private storage spaces on the Fred Hutch cluster, or if you need to access regulated storage.
- Whether or not you want to use a regulated PROOF server. For more information about regulated PROOF servers and regulated storage, see our article dedicated to PROOF Regulated.
To create a blueprint, go to the Account page and click Create new blueprint. You can then give that blueprint a name that’s easy for you to remember, you can specify the Slurm account you want to use, and you can select whether you want to use a regulated PROOF server.
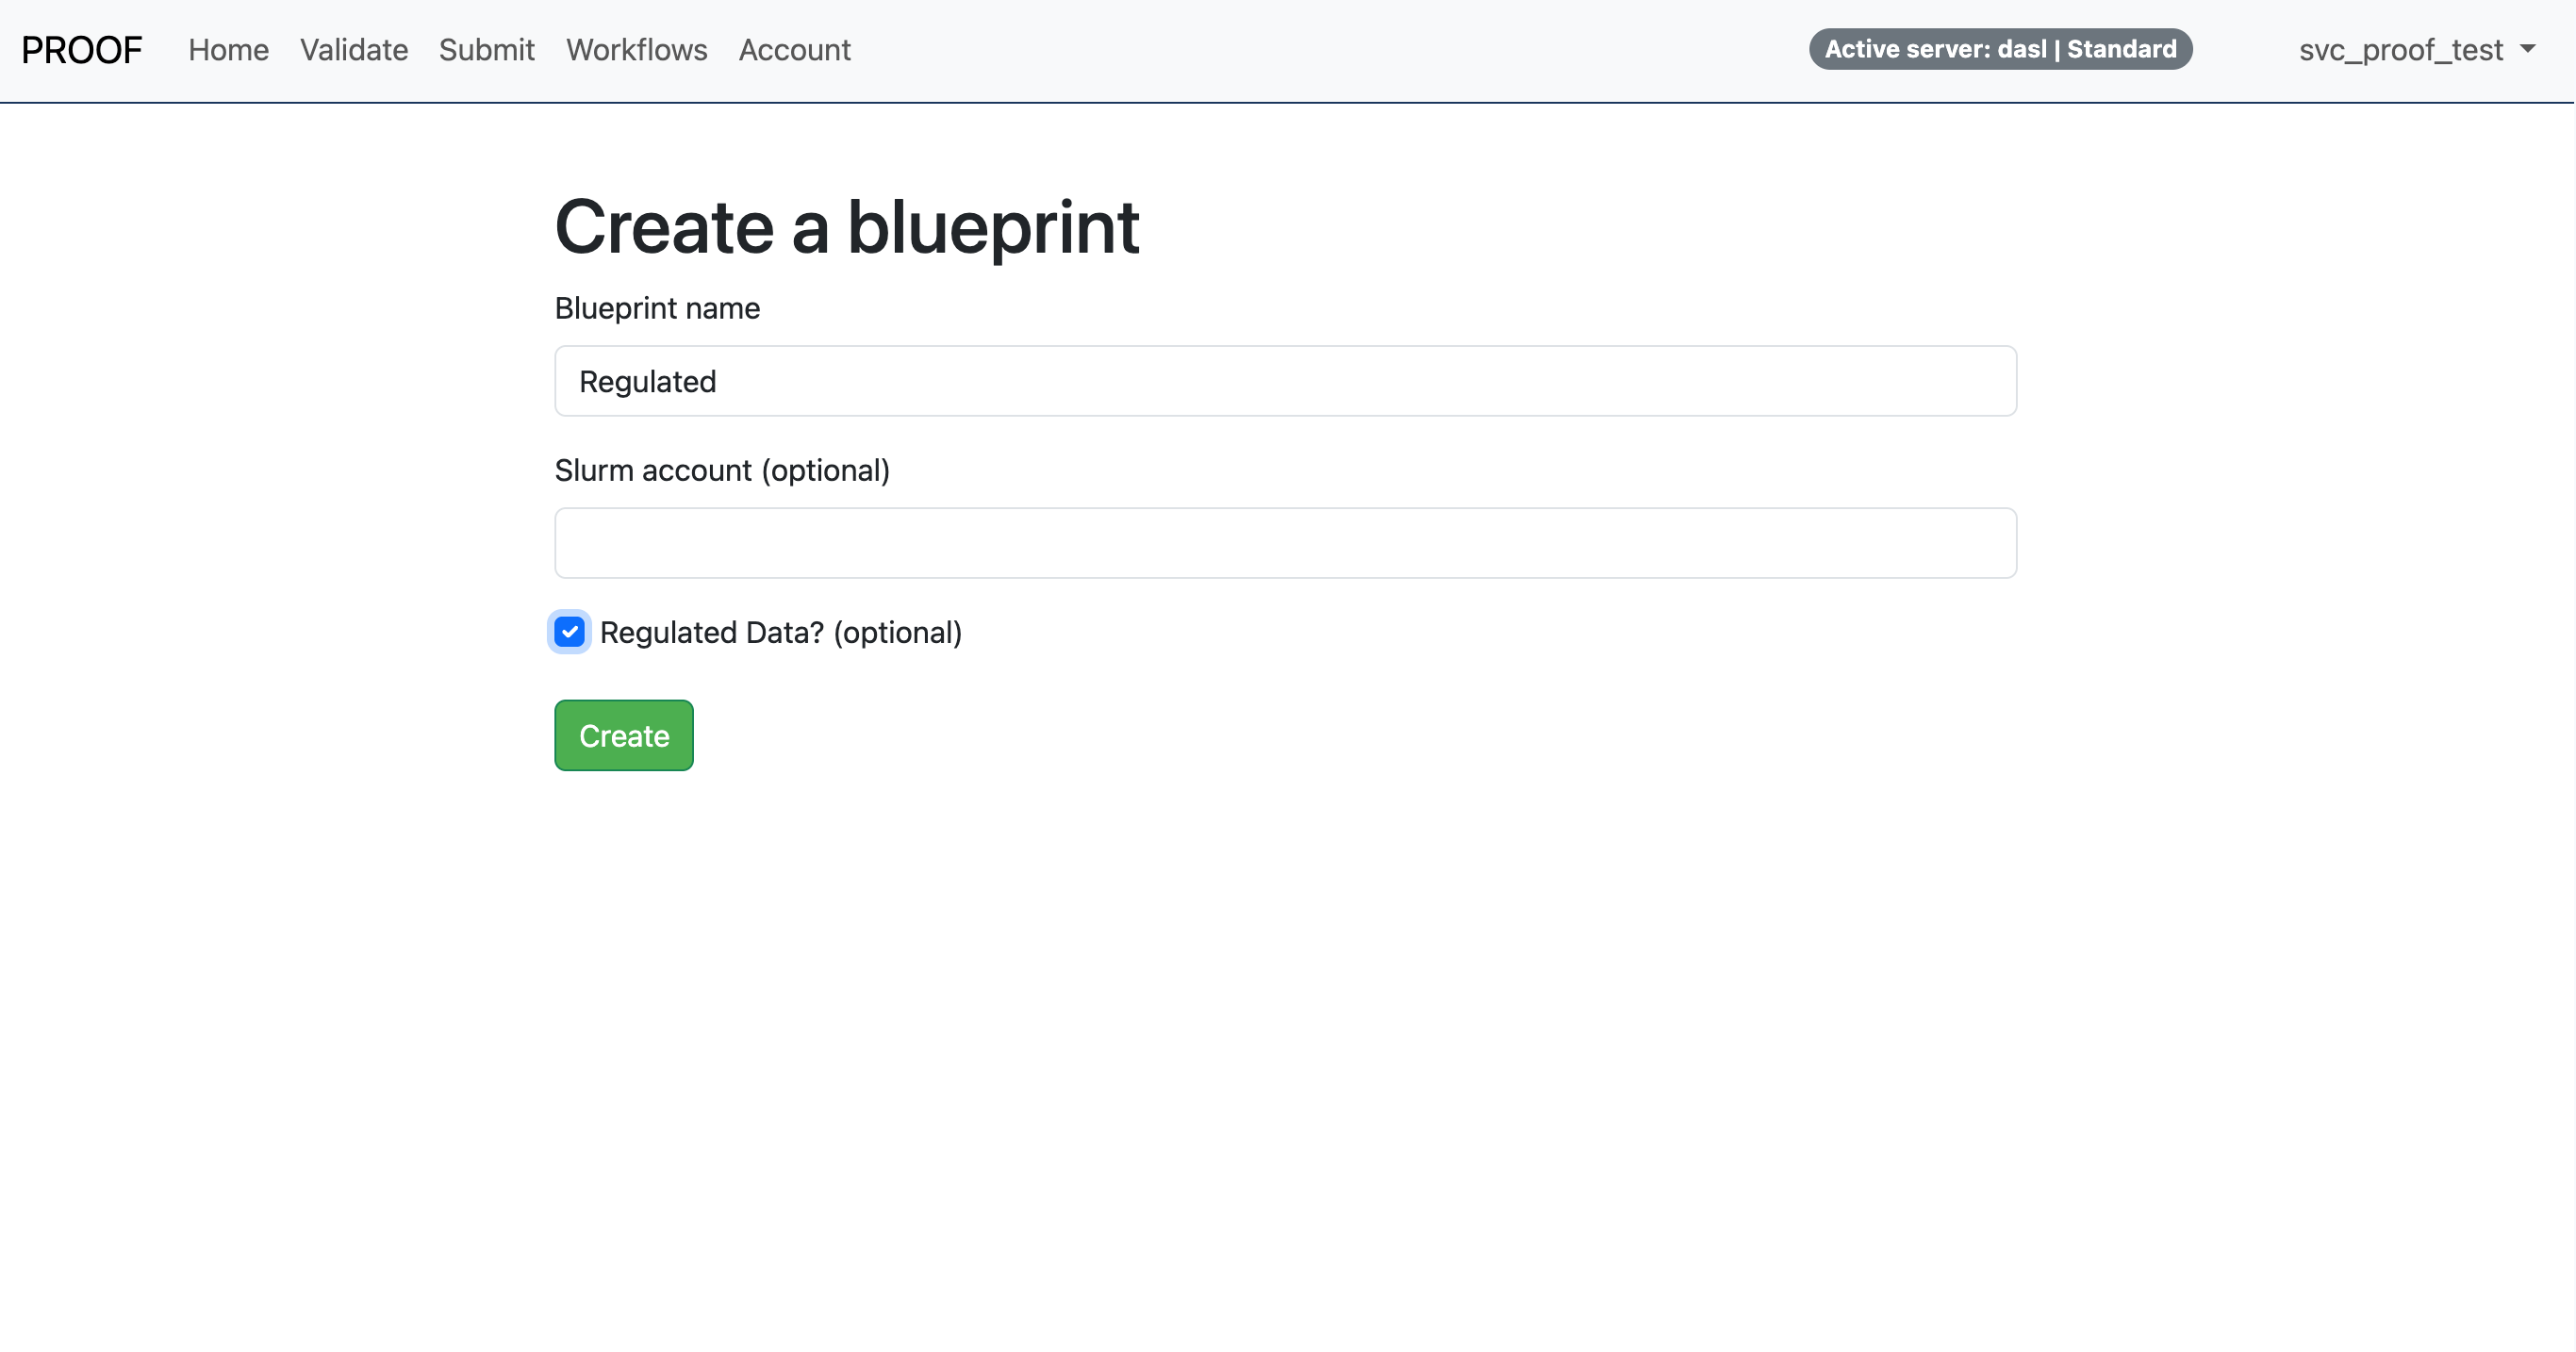
Click Create, then you can see your saved blueprints on the Account page.
To start a PROOF server with a specific blueprint, first make sure you stop your server if you have one running. In the Start a server menu, you should see your blueprint listed. Click it to start a PROOF server with the settings you specified.
Next Steps
Now that you’ve completed your first PROOF workflow, you’re ready to explore more advanced features and expand your computational capabilities:
- Consider exploring the WILDS WDL Library to find pre-built workflows for common bioinformatics tasks.
- Take the Developing WDL Workflows course to learn how to create your own custom workflows.
- For hands-on support, the OCDO offers the WILDS WDL Development Program where you can partner with experts to build workflows tailored to your research needs.
- Get live help via Research Computing Data House Calls for workflow debugging assistance, and Code & Software Data House Calls for help with any PROOF Workbench questions or feedback.