Uploading your study into fh-dasl-cbio S3 bucket
Once your study files are formatted and validated, follow these steps to upload them to the fh-dasl-cbio bucket.
✅ Step 1: Zip Your Study Folder
Before uploading, compress your study folder into a .zip file.
📝 Note: Currently there is a study limit size that is 4Gb. If your study folder is greater than 4Gb please reach out to us for guidance
- On Mac: Right-click → Compress
- On Windows: Right-click → Send to → Compressed (zipped) folder
Or use the command line:
# Go to the folder where your study lives
cd /path/to/directory/cancer_study_identifier

# Zip the folder recursively
zip -r cancer_study_identifier.zip .
📝 Note: The
.zipfile name must exactly match thecancer_study_identifiervalue used in your study files.
🚫 Step 2: Make sure to set up your SSO credentials
Make sure you have configured your single-sign-on (SSO) credentials using these steps
✅ Step 3: Upload Your Zipped Folder to the S3 Bucket
You have three ways to upload your data. Choose the one you’re most comfortable with:
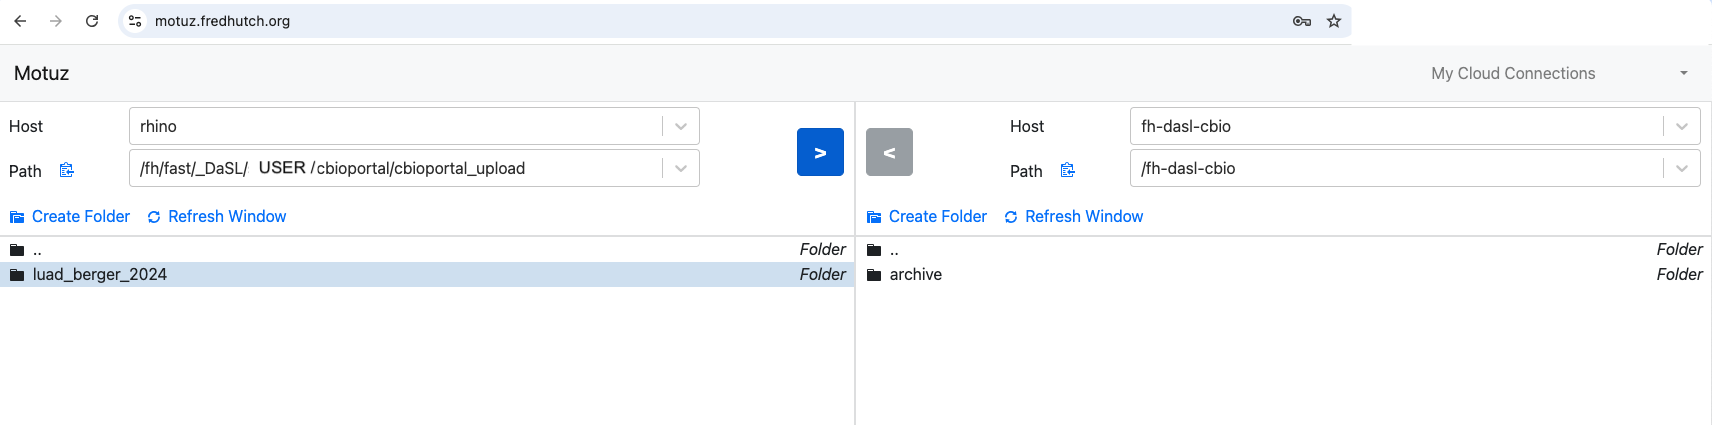
🟦 Option 1: Using Motuz (Simple Web Interface)
- Go to Motuz
- Log in with your Fred Hutch credentials
- Follow these setup steps to configure access to
fh-dasl-cbio - Select your
.zipfile and click the blue arrow to upload
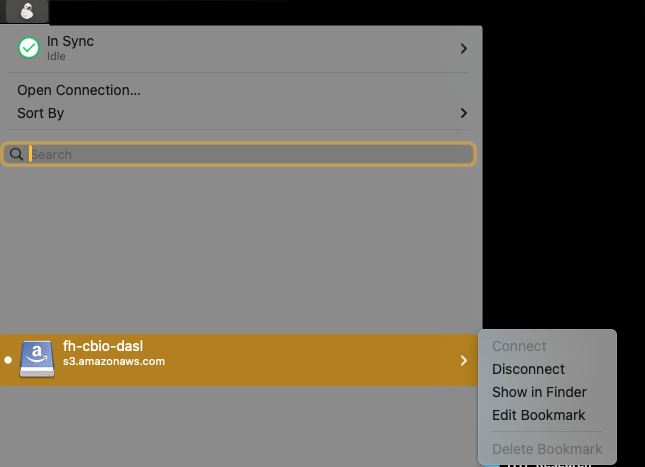
🟨 Option 2: Using Mountain Duck (Drag-and-Drop)
- Follow the Mountain Duck setup guide
- Then configure the
fh-dasl-cbiobucket. - Open the bucket in Finder
- Copy and paste your
.zipfile into the folder
🟫 Option 3: Using the Command Line (for power users)
If you’re comfortable using the terminal and have AWS CLI configured, use:
aws s3 cp /path/to/cancer_study_identifier.zip s3://fh-dasl-cbio/
📝 Note: Make sure your AWS credentials are correctly set up and your lab account has write-only permissions to
fh-dasl-cbio.