How to Use PROOF
Edit this Page via GitHub Comment by Filing an Issue Have Questions? Ask them here.PROOF (PRoduction On-ramp for Optimization and Feasibility) is a user-friendly tool designed for managing and executing WDL (Workflow Description Language) workflows using the Cromwell workflow manager, configured to run on the Fred Hutch cluster. PROOF allows users to:
-
Automate all the backend configurations necessary to run your workflows instantly.
-
Validate, troubleshoot, assess performance, and run their workflows all under one roof.
-
Refine their workflows before potential transitions to cloud-based infrastructures, providing a ‘proofing’ resource of sorts.
This guide is intended to describe how you can run PROOF, catering to varying levels of computational expertise. We also have a Developing WDL Workflows guide that will be a quick-start guide to building a WDL workflow.
Background
What is WDL?
Workflow Description Language (WDL, pronounced ‘widdle’) is a versatile, open specification, workflow framework for executing bioinformatics and computational workflows. WDL offers:
-
A standardized and modular approach to specifying and combining computational tasks, inputs, outputs, and dependencies.
-
A task-oriented approach promoting code reuse and modularity.
-
Support for parallel execution, enabling efficient processing of large datasets.
-
Explicit data type definitions and immutability of variables by default, ensuring data consistency.
-
Built-in support for specifying data locations, facilitating seamless collaboration across environments.
-
Support for scatter-gather operations, improving workflow performance.
-
Flexible syntax for concise and readable workflow definitions.
-
Platform independence, allowing WDL workflows to run across different environments.
-
Requirement of a scientific workflow engine like Cromwell for interpreting and executing WDL on various backends, enhancing usability and versatility.
What is Cromwell?
Cromwell, originally developed at the Broad Institute, is a WDL workflow engine, that facilitates the orchestration of multi-step workflows. It efficiently handles individual tasks, monitors job metadata, offers an intuitive API interface, and enables users to oversee multiple workflows concurrently. While other WDL engines exist, here are some of the reasons Cromwell stands out:
-
Integration with the Fred Hutch cluster: Cromwell has been configured to run on the Fred Hutch cluster to make running WDL workflows very simple. Additionally, it seamlessly integrates with various cloud platforms and workflow description formats, enhancing compatibility and facilitating workflow execution across different computing infrastructures.
-
Robust Workflow Management: Cromwell offers a robust engine for managing complex workflows, ensuring efficient execution of tasks and streamlined workflow orchestration.
-
Scalability: With its ability to handle large-scale workflows, Cromwell accommodates projects of varying sizes, from small-scale analyses to large-scale data processing pipelines.
-
Comprehensive Job Monitoring: It provides comprehensive job monitoring and metadata tracking, enabling users to closely monitor workflow progress, identify bottlenecks, and troubleshoot issues effectively.
-
Community Support and Documentation: Cromwell benefits from a supportive community and extensive documentation, offering users access to resources, tutorials, and community-driven solutions to common challenges.
-
Open Source and Customizable: Being open-source, Cromwell allows for customization and adaptation to specific workflow requirements, empowering users to tailor workflows to their unique needs and preferences.
How should we use Cromwell?
In general, Cromwell works best when run in server mode, which means that users start a Cromwell server as a job on our local SLURM cluster that can connect to a database specifically for Cromwell workflow tracking.
This Cromwell server job then behaves as the workflow coordinator for that user, allowing a user to send workflow instructions for multiple workflows running simultaneously.
The Cromwell server will then parse these workflow instructions, find and copy the relevant input files, send the tasks to the cluster (Gizmo) to be processed, coordinate the results of those tasks and record all of the metadata about what is happening in its database.
This means that individual users can:
-
Run multiple independent workflows at the same time using one Cromwell server
-
Use cached results when identical to the current task
-
Track the status of workflows and tasks
-
Customize the locations of input data, intermediate data, and workflow outputs into data storage resources appropriate to the data type (re: cost, backup, and accessibility)
-
Query the Cromwell database for information about workflows run in the past, including where their workflow outputs were saved or a variety of other workflow and task level metadata.
Quick note: the Cromwell server is referred to as a PROOF server in these instructions. PROOF handles setting up the Cromwell server for you.
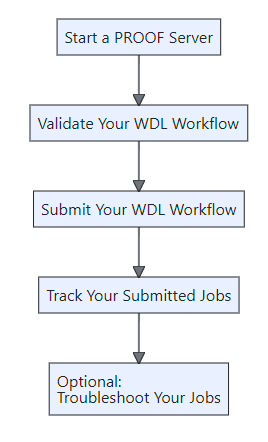
Using PROOF
The following diagram shows basic usage of PROOF once you have done the preliminary setup. Each box corresponds to a section in the documentation.
Preliminary Setup
Before you begin using PROOF, make sure you have the following:
- Valid Fred Hutch credentials
- Access to the Fred Hutch network
- If on-campus, make sure you are connected to the Marconi network.
- If off-campus, make sure you connect via VPN.
- Access to the rhino cluster of Fred Hutch
- AWS credentials (if needed for S3 file storage for your workflows)
Starting a PROOF Server
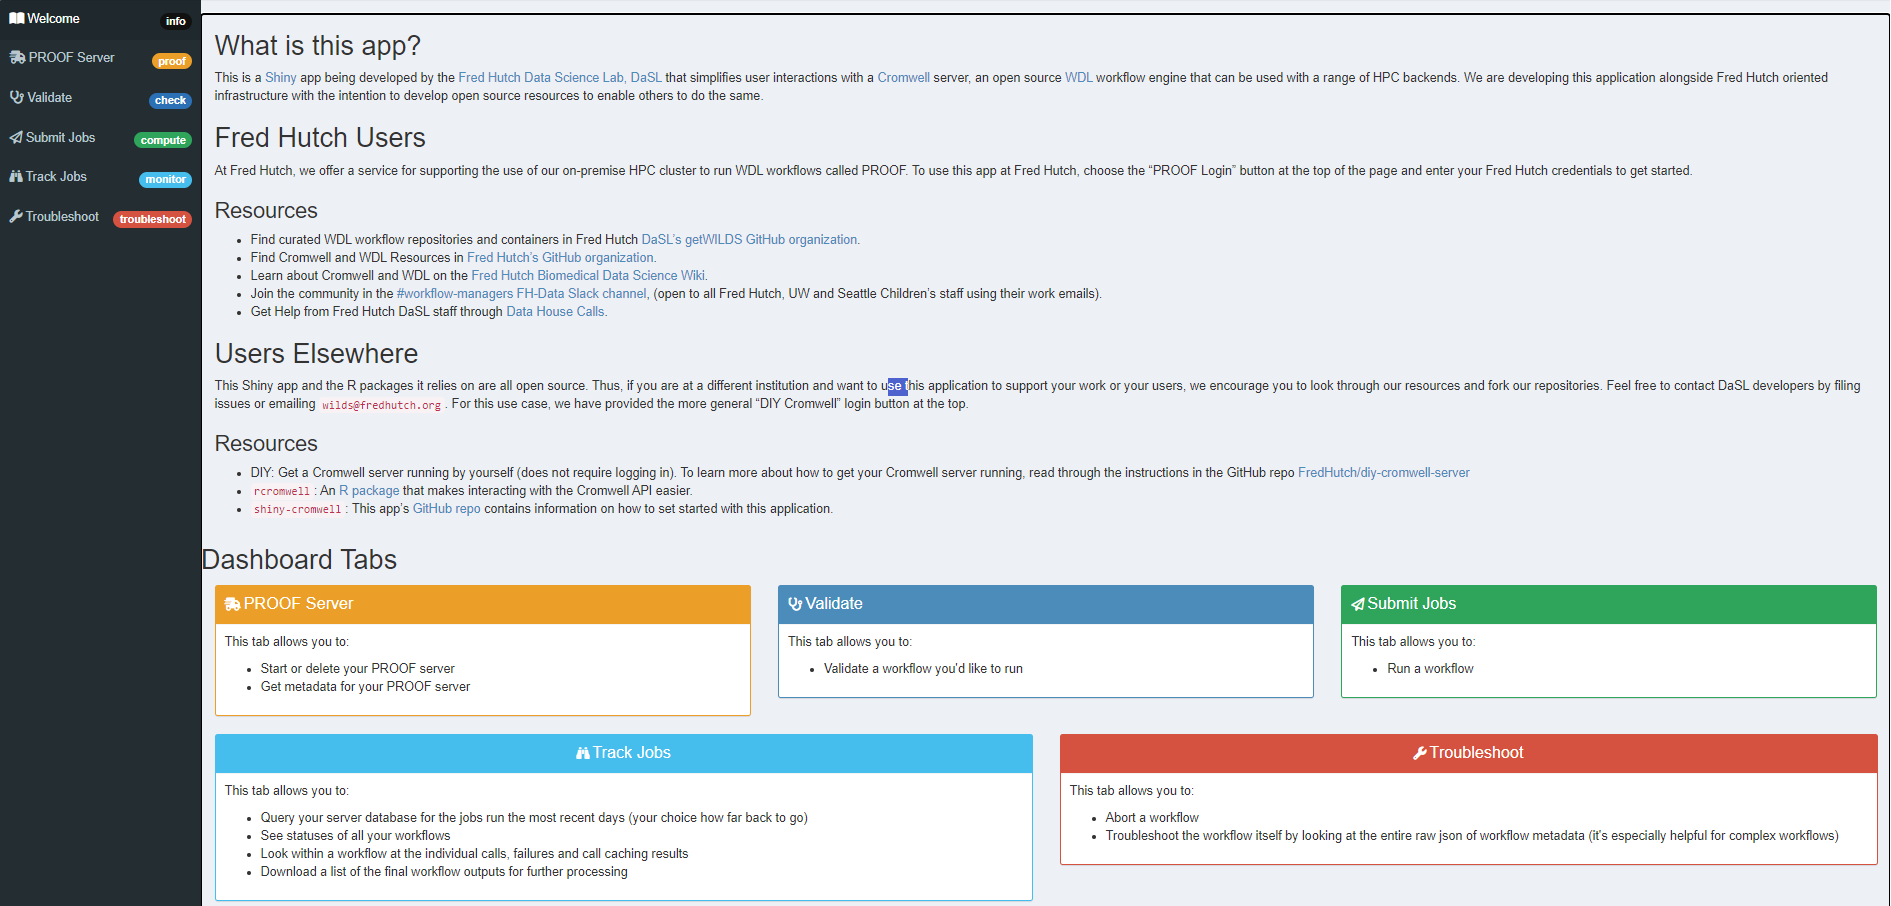
The most user-friendly way to validate, submit, track, troubleshoot, and (if needed) abort your WDL workflows is through our Fred Hutch PROOF Shiny app. This Shiny app will let you use a graphic interface to submit and manage workflows you’ve written in WDL.
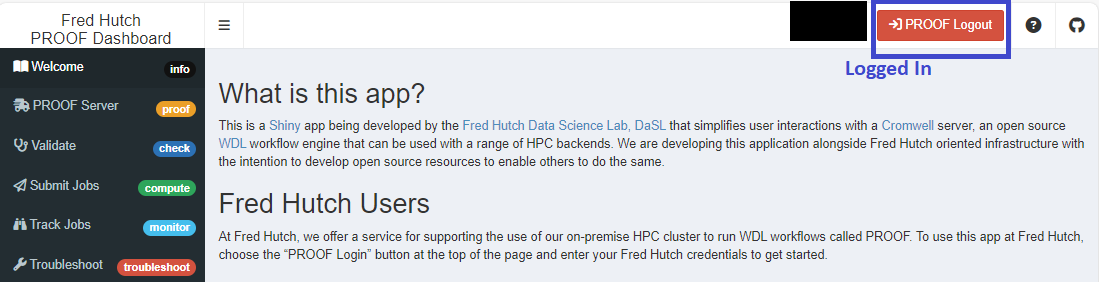
The first step is to log in to PROOF.
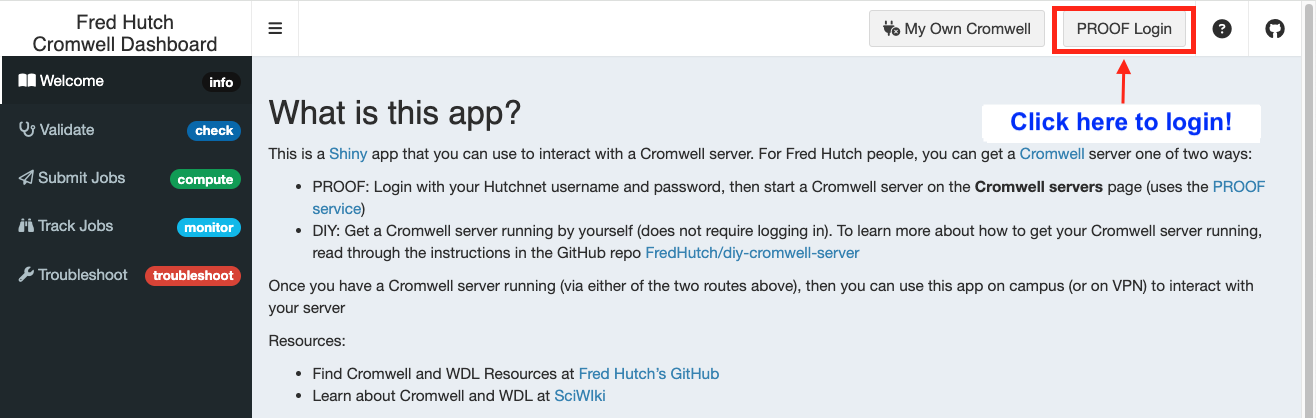
When you click “PROOF Login”, a box will appear where you will input your Hutch credentials and then click submit.
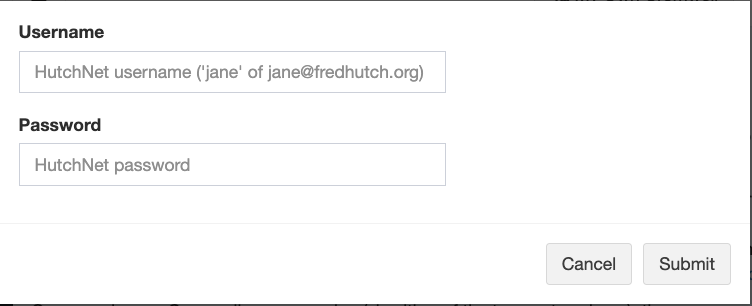
You know you are logged in when the page refreshes automatically and you see the red log out button appear.
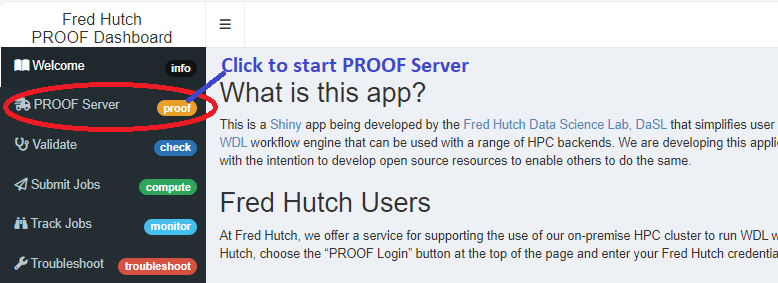
Next click on “PROOF Servers” to take you to the page where you can start a server.
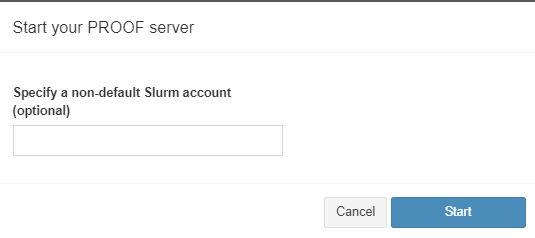
Click “Start” to open up a dialog box that asks for optional credentials to start your PROOF Server.
The majority of people usually are only authorized to work under one SLURM account (working under one PI = one SLURM account). In this case, just hit start and all Cromwell configurations will default under the SLURM account you are authorised under.
However, if you have more than one SLURM account that you can work under, then here is your chance to enter the most appropriate one (for example you could be authorized to do work under two PI’s with SLURM accounts “pi_a” and “pi_b”. If the current workflow you want to submit is for “pi_b” enter pi_b where it asks for SLURM account).
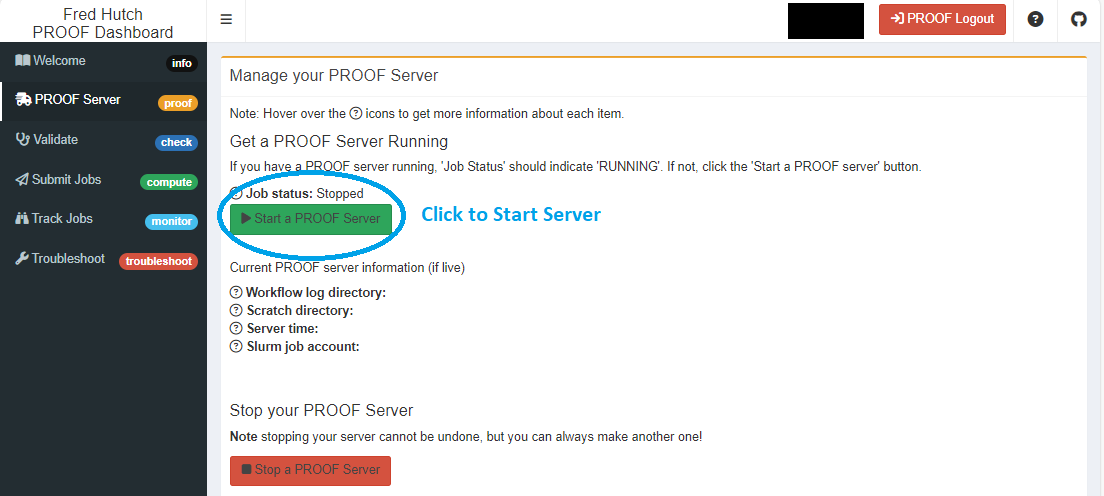
You know your server is up and running when the page auto-refreshes and you see the “Start” button gray out and information about your server populated below.
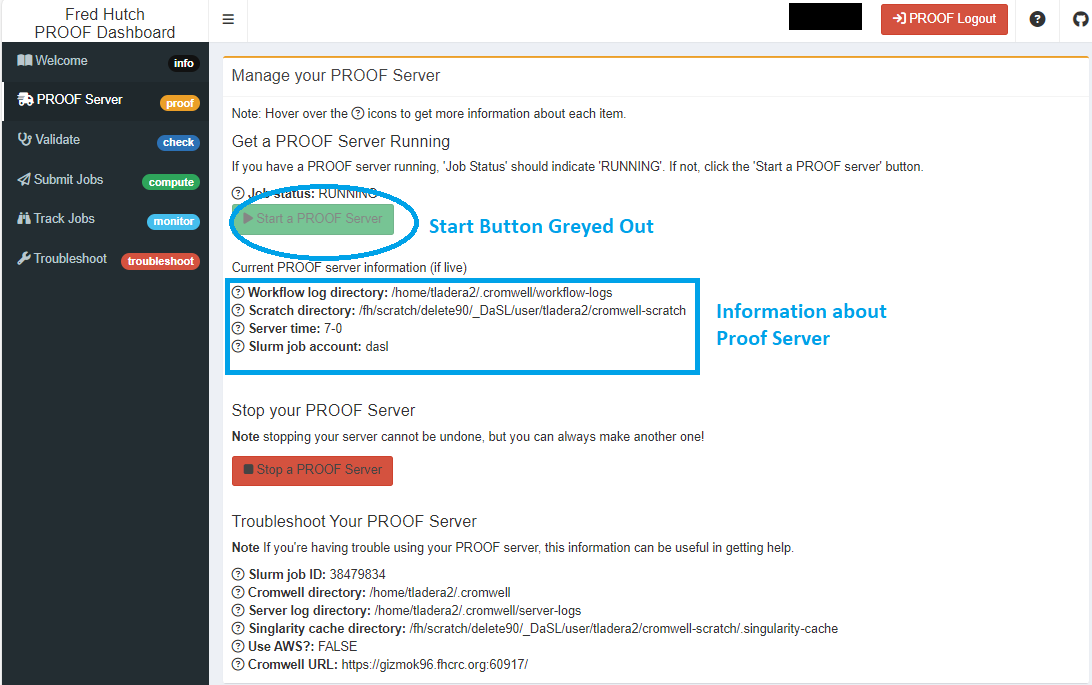
Initially, setting up a PROOF Server may take a few minutes as it configures the database and performs background tasks. Once it’s ready to receive workflows, it will begin listening for instructions via the Shiny app or other methods (discussed later). Please allow 2-3 minutes for setup the first time; subsequent setups will be faster, typically around 1 minute.
There will be two sections of information that you would like to pay attention to which should be populated with details that will be relevant.
Server information
- Job status: it should say “RUNNING”
- Workflow log directory: Gives you the path to where your workflow logs will reside
- Scratch directory: Gives you the path to where your workflow outputs will go
- Server-time: It tells you how long your PROOF Server will be “alive”. By default this is set to 7 days
- SLURM job account: The SLURM account (default/or if specified) under which your jobs should be running
Troubleshooting
- SLURM job ID: This is the PROOF server job ID. You can use this to cancel your PROOF server through
rhino - Cromwell directory: The path to where you main Cromwell directory exists
- Server log directory: The path to where logs associated with the PROOF server exists
- Singularity cache directory: Path to Singularity cache directory
- Use AWS?: This defaults currently to FALSE
- Cromwell URL: URL for PROOF server
Once your server is ready for use, you should receive an email from PROOF API 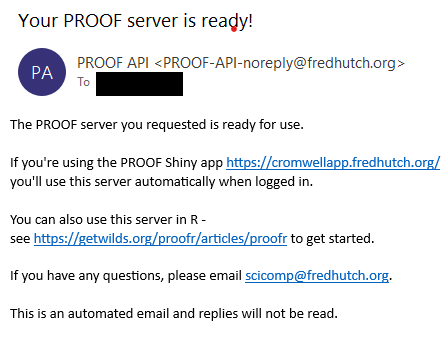
Validating Your WDL Workflow
Now that you have kicked off your PROOF server, you are ready to start running your WDL workflows. The first step to submitting your workflow is to validate if your WDL workflow and accompanying JSON files are “runnable”. If you already have a workflow ready, you can perform a “dry run” to check your workflow files (WDL/JSONs) using the “Validate” tab.

You can upload your WDL workflow file and associated JSON file into the respective upload boxes. You can do this by either dragging the files into the upload boxes or browsing to the directory where the workflow and JSON files are stored. Once uploaded, click validate.
Note: If you have more that one JSON file required to run your WDL workflow DO NOT upload any JSON files. You can still validate your WDL workflow but uploading only one JSON file (when two are needed) will not validate.
The validation process evaluates several things:
- Ensures the files are in a known format that Cromwell can interpret.
- Verifies that they are properly formatted.
- Confirms that the tasks are wired up correctly.
Note : During a dry run, Cromwell does not test the availability of your input files. This is because Cromwell can access files from a variety of sources, including local filesystems, AWS S3, Google buckets, and Azure blobs. Testing for input availability only happens when you execute the workflow for the first time. If some input files are missing, Cromwell will continue to execute tasks for the available input files while skipping tasks where inputs cannot be located.
Here is an example from the test workflows showing successful validation
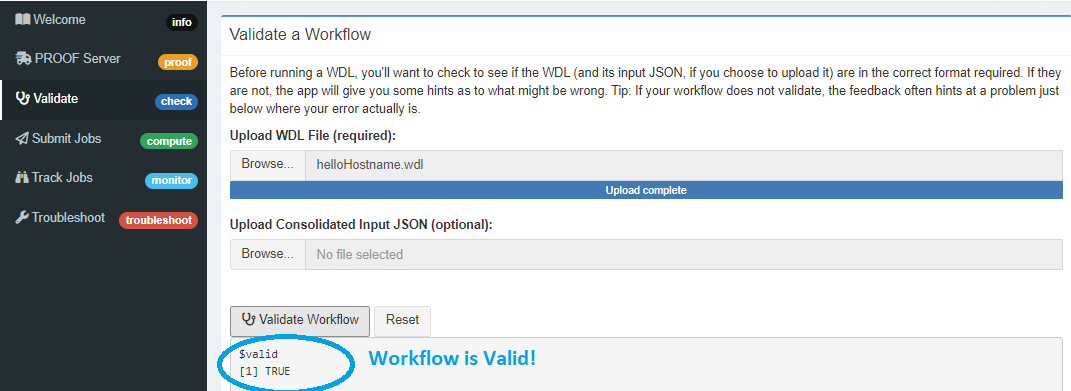
If your workflows and accompanying JSON files are validated you should see in the console below
$valid
[1] TRUE
If your workflow does not validate, the console will provide some “helpful” information on what could potentially be wrong. You can then go back to the drawing board to fix the errors and re-validate.
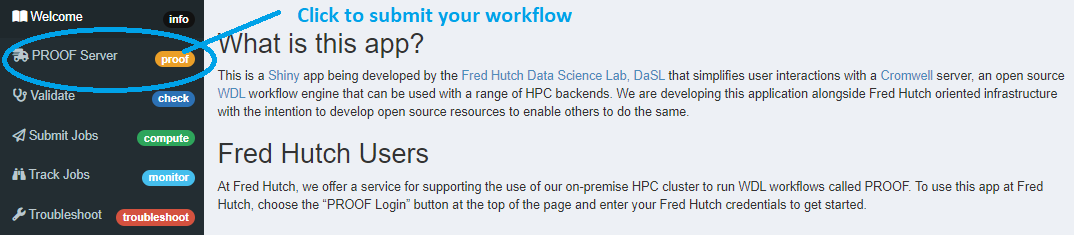
Submitting Your WDL Workflow
Congratulations! At this point, you should have a validated WDL workflow and you are ready to submit your job.
To submit your job click the “Submit Jobs” tab on the left
This will open up the “Submit Jobs” page:
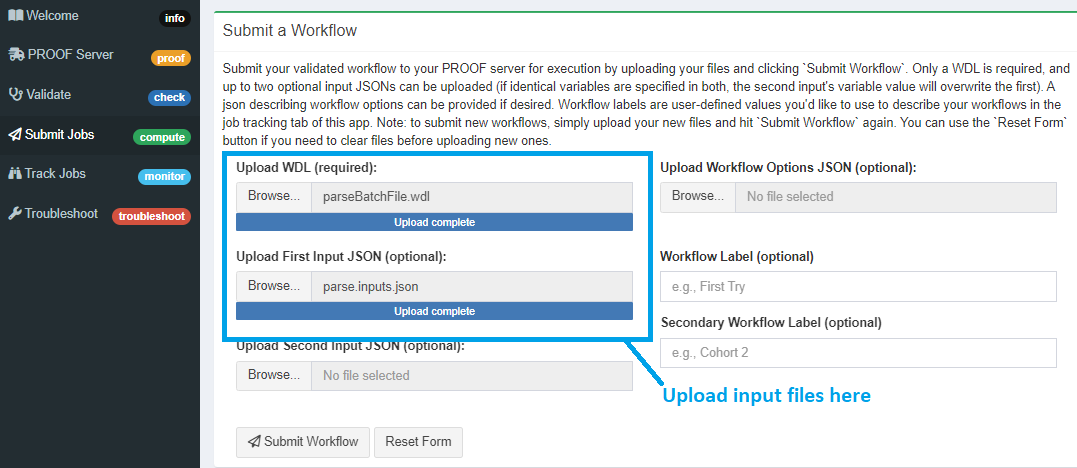
Here you can do the following:
-
Upload your WDL workflow
-
Upload up to three different JSON files that accompany your workflow.
Note: You can run a workflow with no input JSON or 1-3 input JSONs. If you have multiple JSONs, note that these will be concatenated or the second will overwrite the first if the same variable is declared in both. You can upload a workflow options JSON, as well as providing text labels of your choosing to workflows if you’d like.
- Add a primary and secondary workflow label to easily track them
Note: As you upload your files look for the blue uploading progress bar below the upload box. If you need to add files different from the ones uploaded, click the “Reset” button. This will clear all the upload fields allowing you to upload a new set of files.
Once everything is uploaded, click the “Submit Workflow” button.
You will know that your submission has worked once you see a little table output on the same page!

This output table has an ID which a long string of letters as numbers that you can use to follow-up on your workflow in the “Track Jobs” tab. This workflow id string is unique to an individual workflow run, so if you run the same workflow a second time, you’ll get a different string. This means that this unique identifier string can be used to help understand the data source file(s) used to generate each set of results files, helping make your work reproducible.
Note: You don’t need to copy this workflow ID, we have a nifty copy button in the “Track Jobs” tab !
Tracking Your Submitted Jobs
Once you’ve submitted a workflow, you can track the status of your submitted workflows using the “Track Jobs” tab

Filter submitted jobs you want to track You can filter your jobs 3 different ways! Initially this is likely not needed, however as PROOF can manage several different workflows running at once you’ll eventually want to filter results to track specific work at a time.
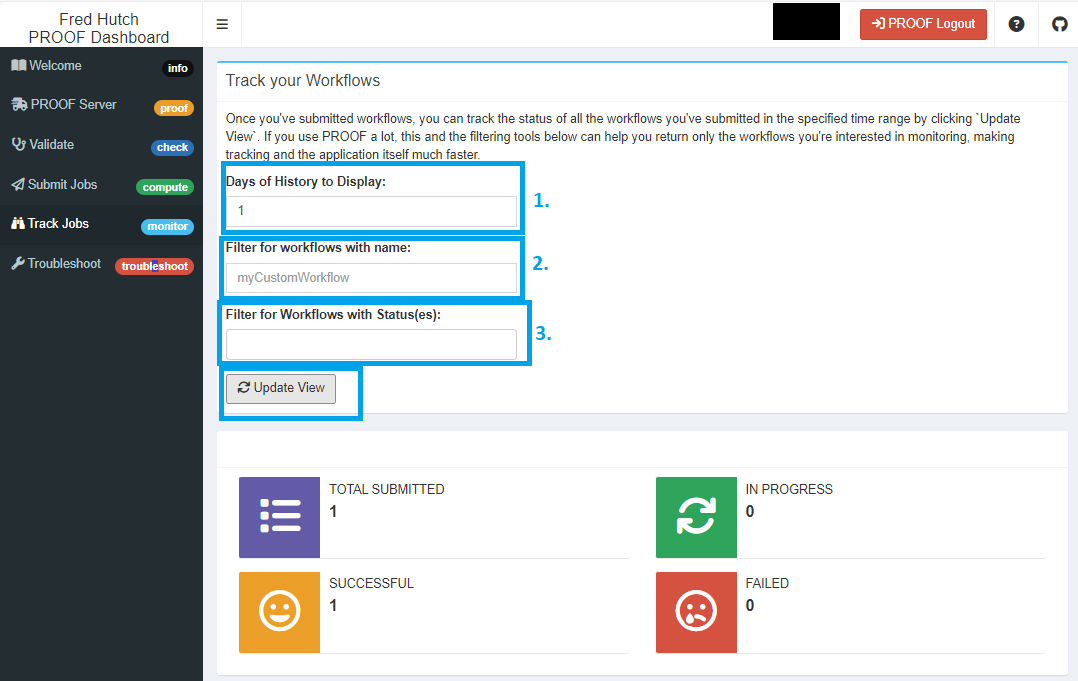
You can filter submitted jobs based on:
- Days since your server was started
Note: This maxes out 7 days. And displays history of the current PROOF server.
-
Using the custom workflow name you have given when you submitted your job
- Based on the status of the job
Note: You can use all these three options in succession. For example you can display as many days of workflow history as you’d like, filter that result for workflows with a specific name or with specific status(es) like ‘failed’, ‘succeeded’, etc. This can help if you have submitted a LOT of workflows and you don’t want to see them all, or if the PROOF server is still busy working through all of your submissions and recording their status.
Once you are done filtering down to your choices and click “Update View”, the relevant workflows will be returned and you’ll see a visual representation on those workflows.
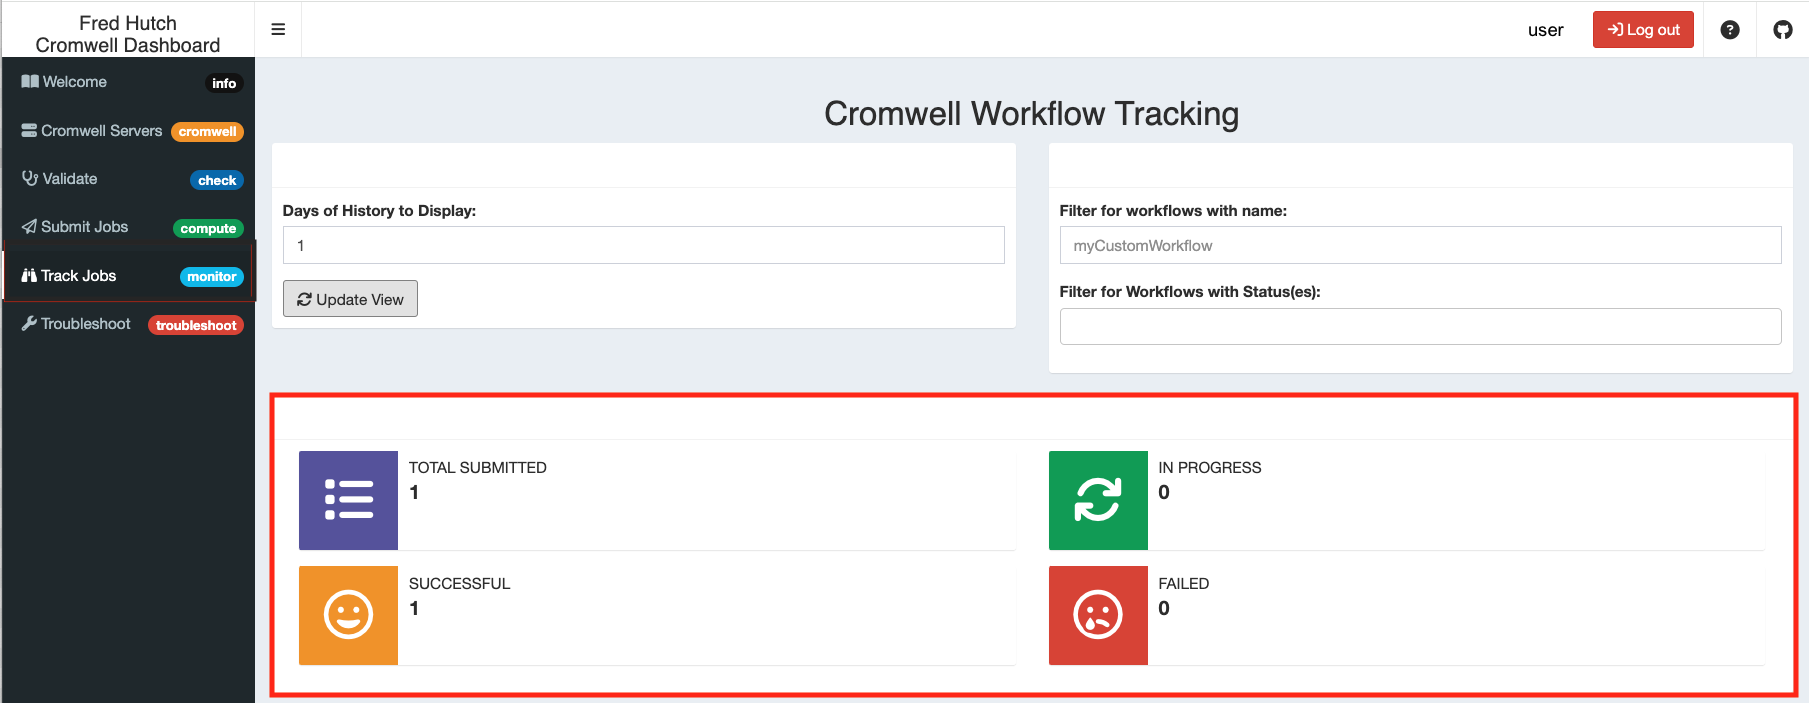
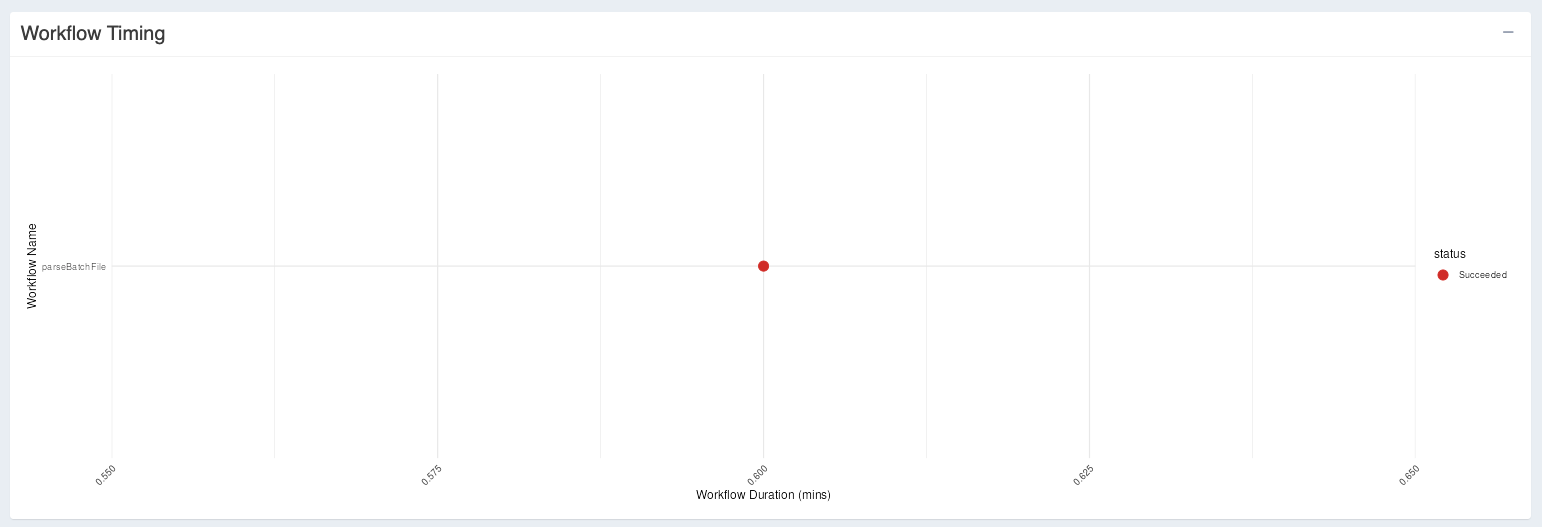
Below this tab you will also see a graph showing “Workflow Timing” information along with outcomes (Graph legend = “Status”). The x-axis shows how long it took to run a particular workflow and the y-axis will show you which workflow (from a potentially filtered list of workflows)
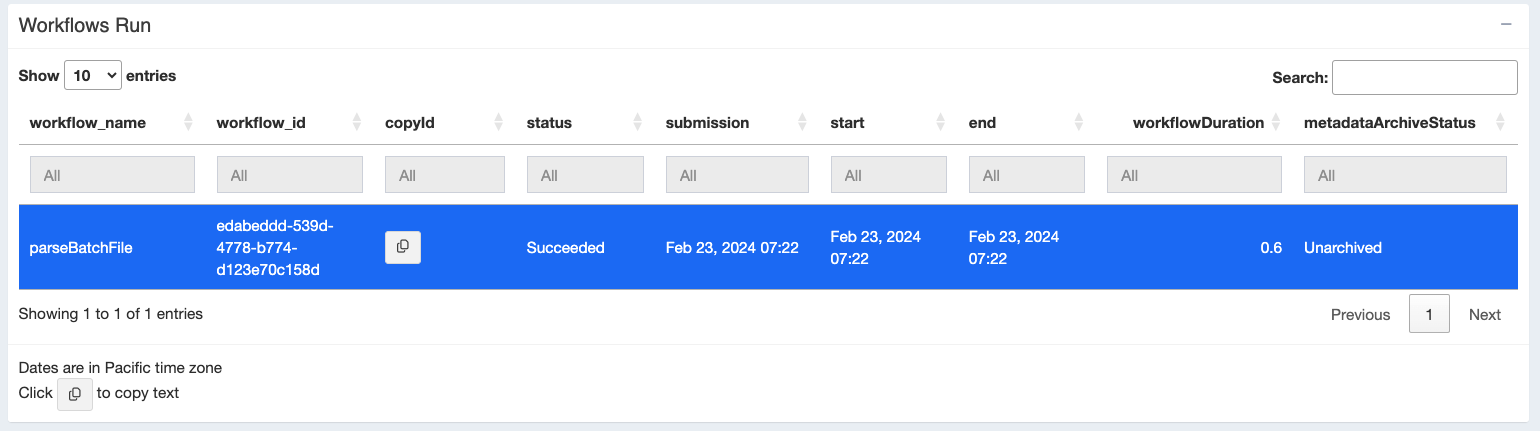
Finally below this visual representation of all your workflow runs you will see a “Workflows Run” table showing metadata for each workflow. Click on the workflow you’re interested in to populate the rest of the tables (below).
Note: Next to each workflow in the table we have a nifty “copyID” button that you can use to copy your workflow ID for use elsewhere in the app.
You can also see a visual summary of the workflow below
Track workflow-level details
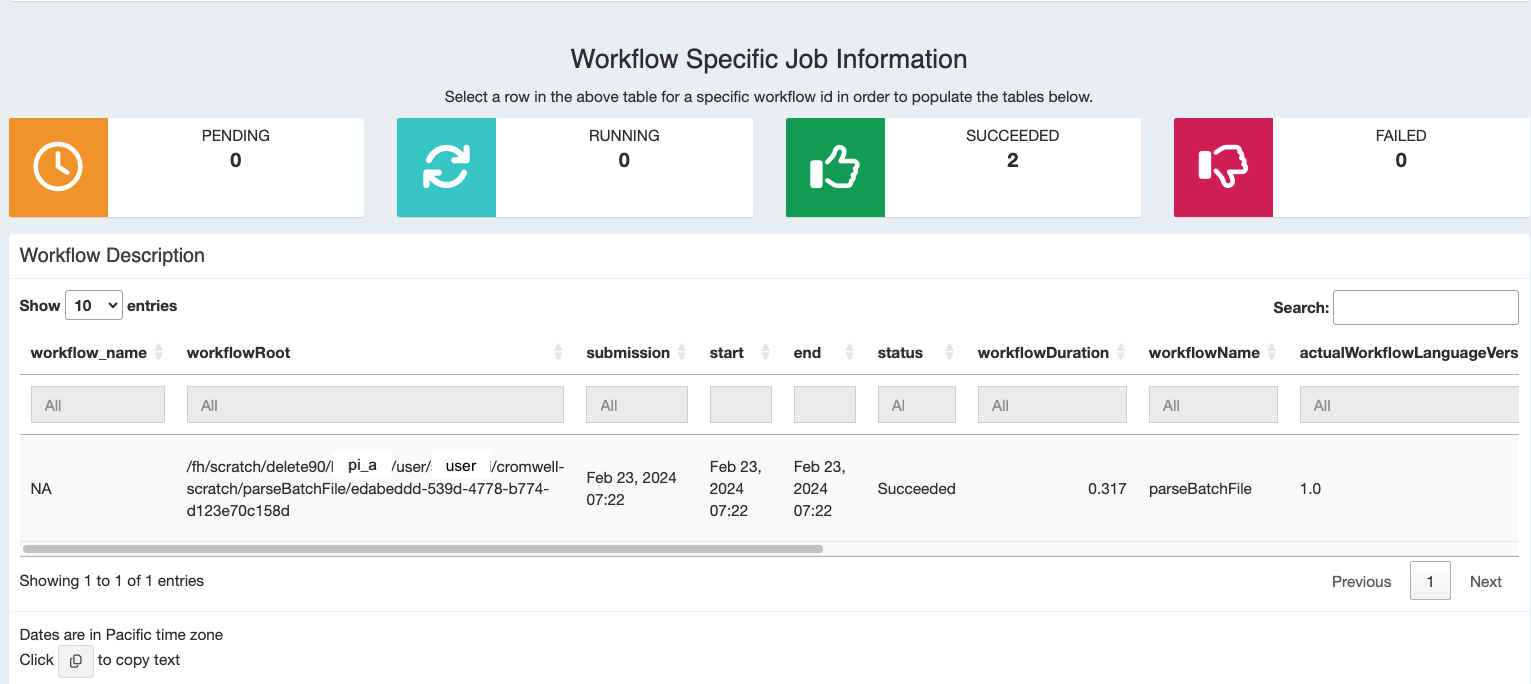
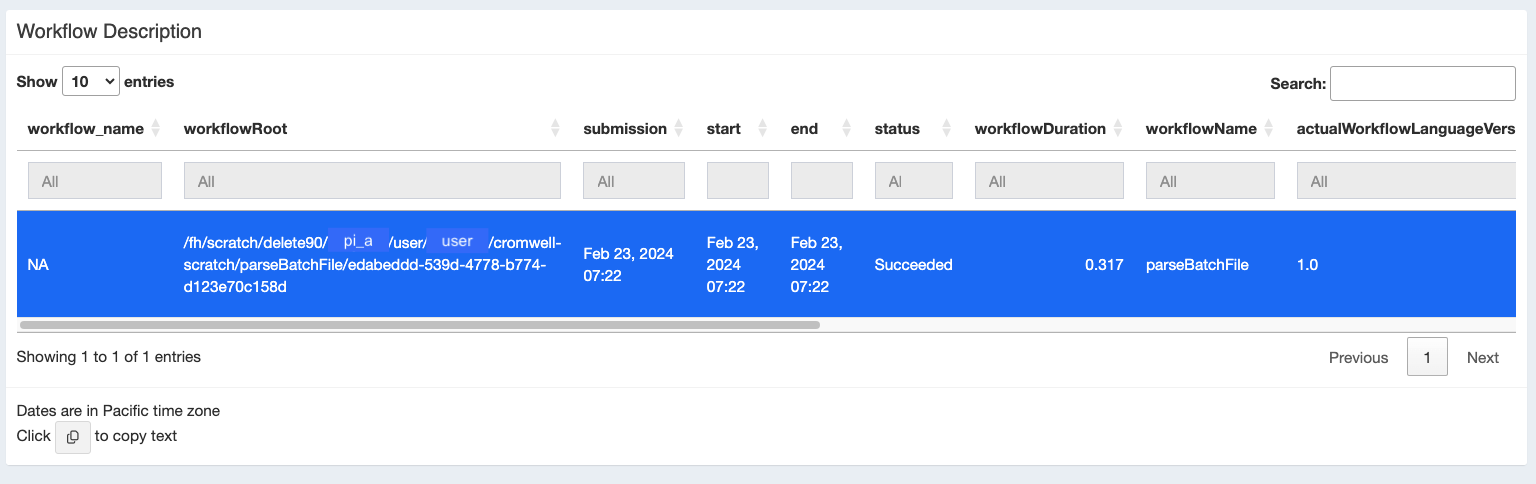
To get more information on a particular workflow select a workflow and you’ll see some summary information about that workflow as you scroll down.
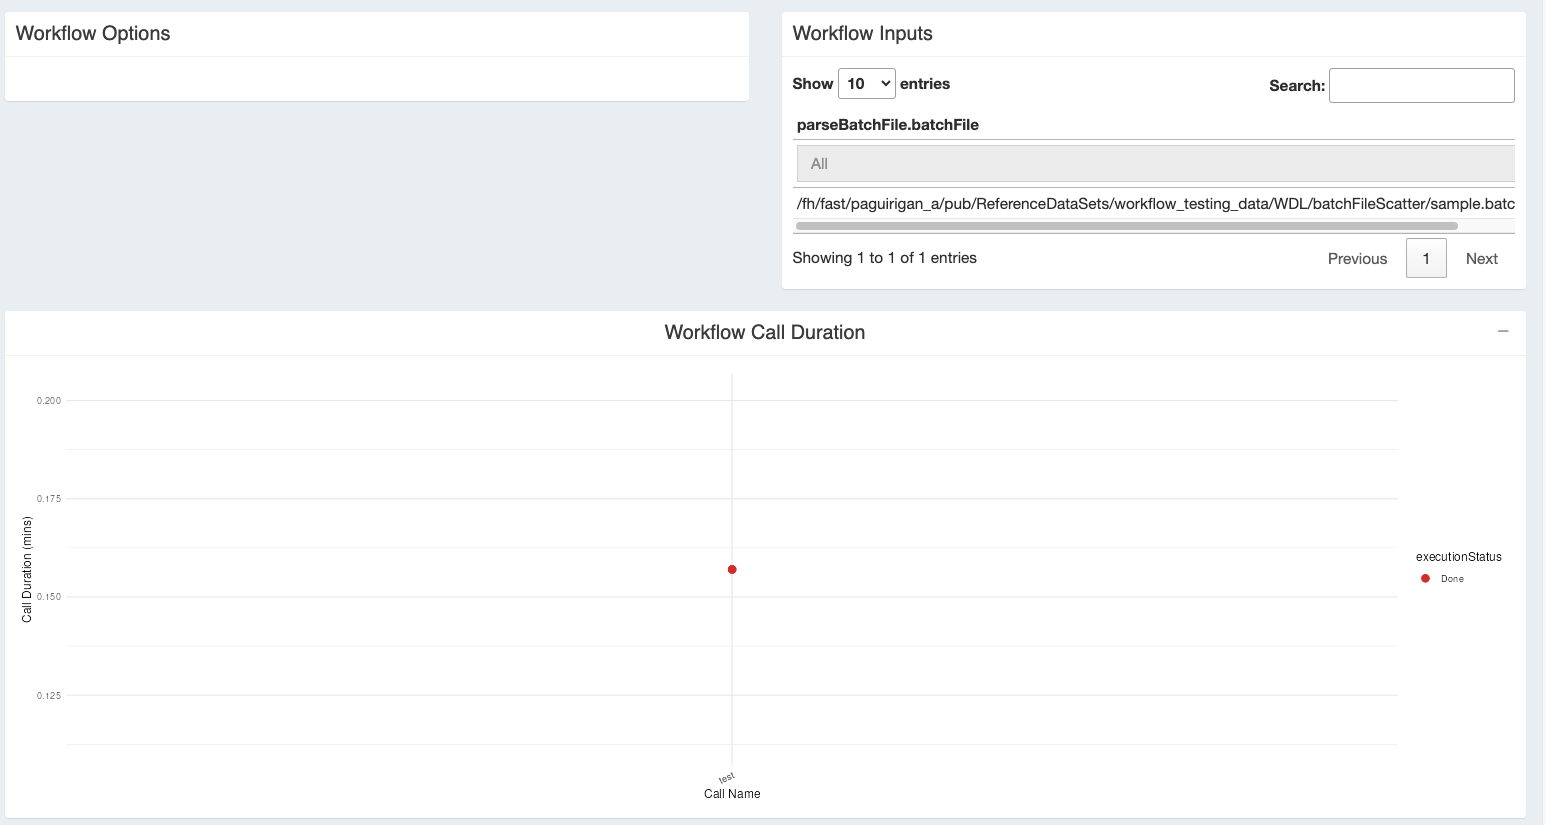
You can see a plot of the timing and outcomes of each call in that workflow.
Track call-level details
To get more detailed information about each “task” in your WDL workflow you can scroll down to see the “Job List” table. This table has usefule information such as the directory where the job is working (callRoot), its SLURM “job_ID” , what computing resources or software environment were used, and the job’s status.
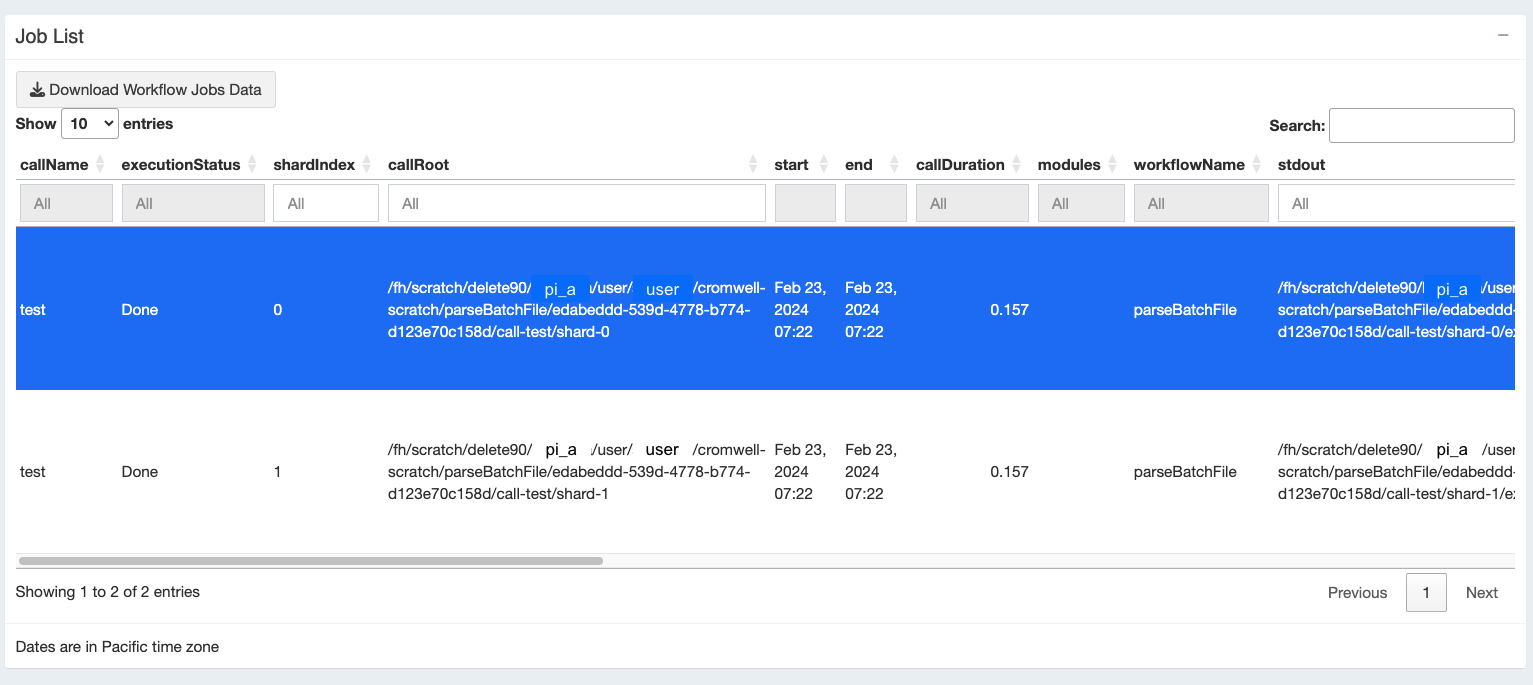
You can then click on a specific task of choice to get more information on that specific task/call.
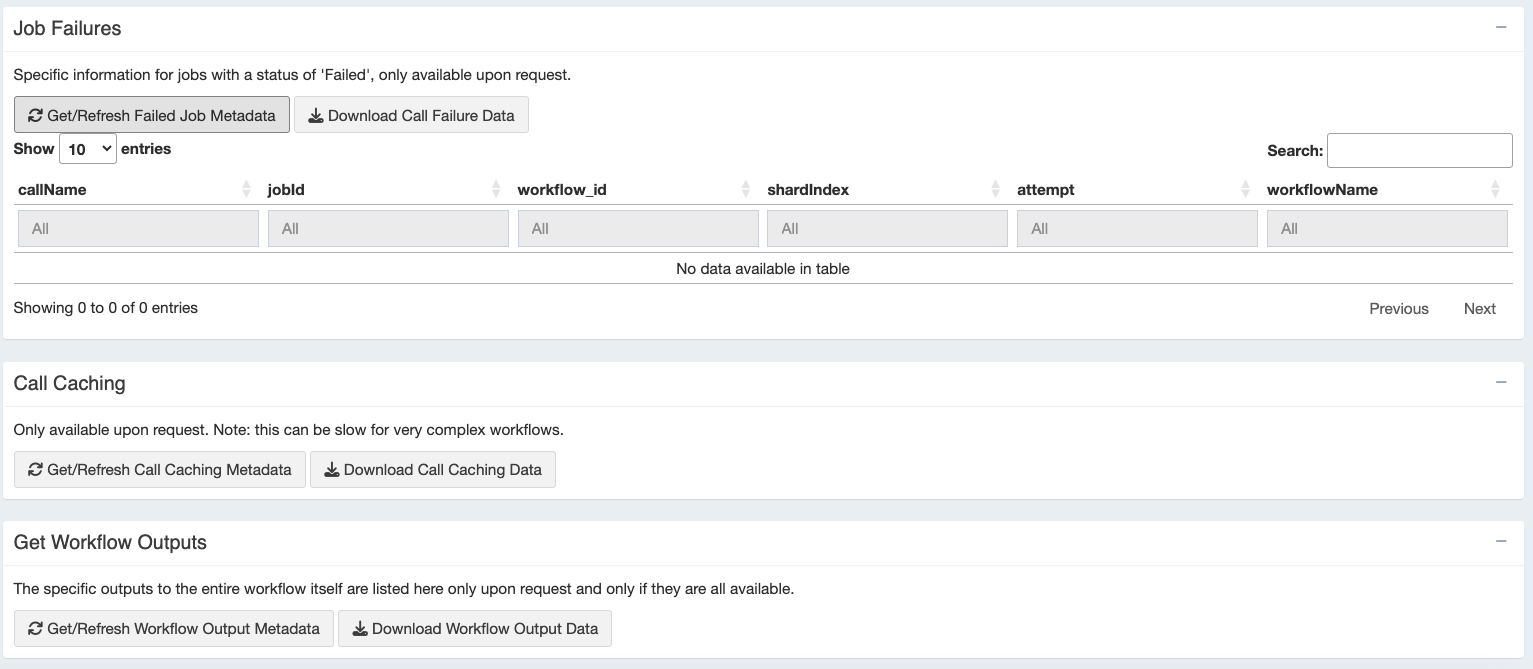
You can use the Job Failures, Call Caching, tables to retrieve information relevant to those processes. You can do this by clicking the “Get/Refresh … Metadata” buttons (sometimes for complex workflows these can be quite large, and thus they do not load until you want them). You can also choose to download these tables if you like.
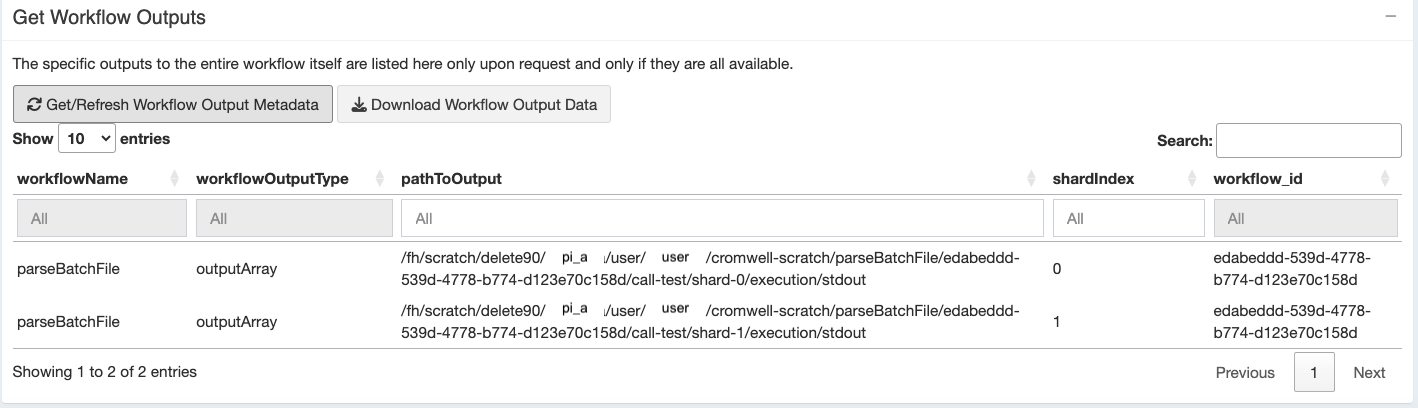
Tracking the location of your outputs
Finally, once a workflow’s outputs have all been created successfully, Cromwell can tell you (and this Shiny app can help you download) a table showing where to find the workflow outputs (note this is not every file created, only the ones you specify as “results” using the WDL file’s “workflow output” block).
This lets you find output files and interact with them, archive them, or otherwise copy them to longer term storage for use.
Troubleshooting
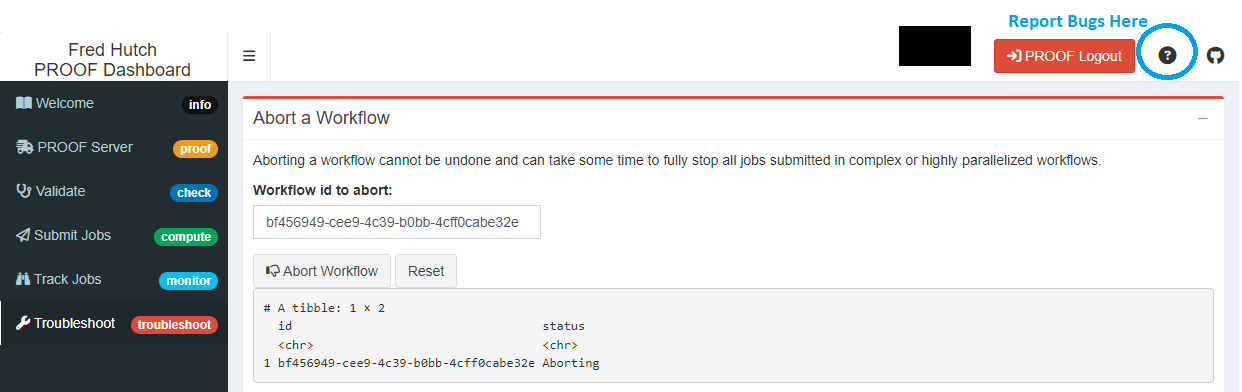
Last, there is the Troubleshoot tab. Here you can do things like Abort running workflows or get a complete metadata output for the entire workflow to parse yourself to try to find what’s happening with your workflow if it failed running.
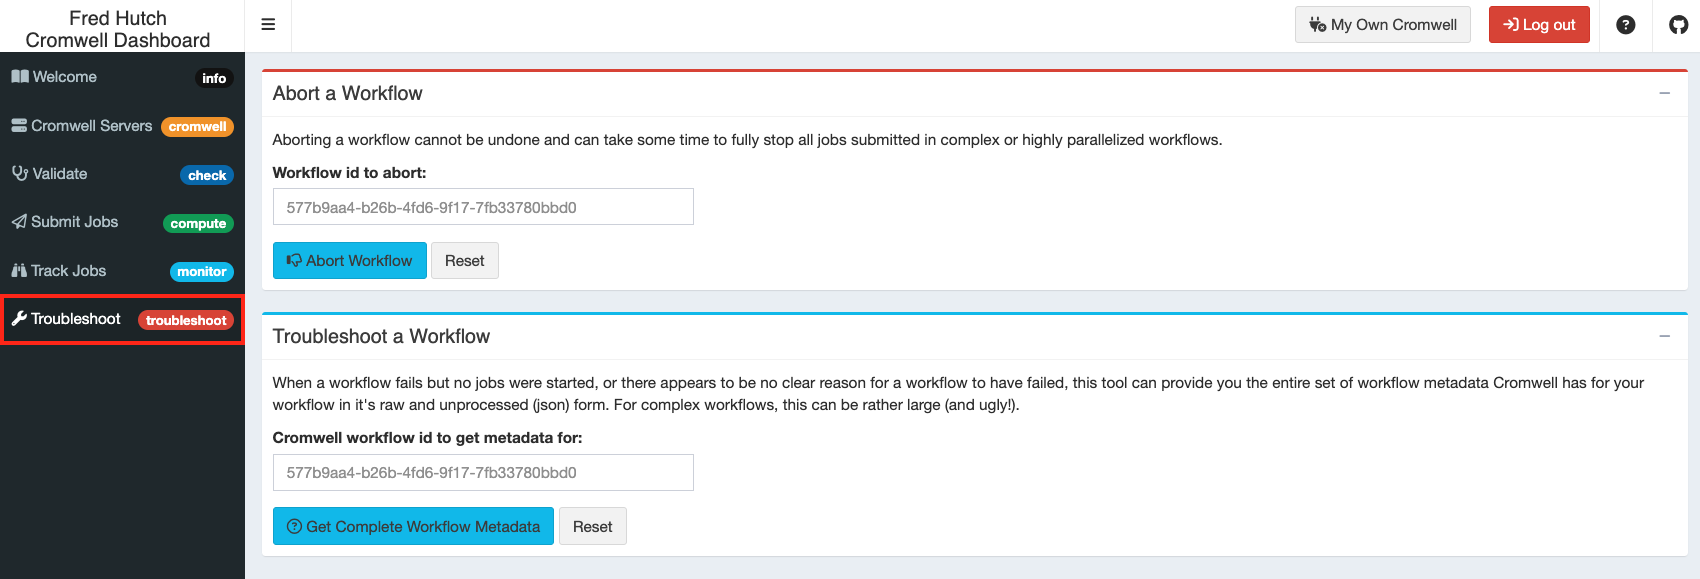
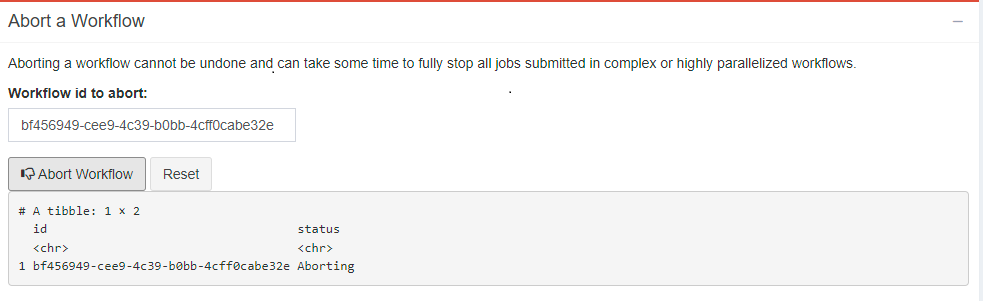
Abort a workflow
Sometimes you realize you want to kill a workflow. Using the workflow_id, you can kill specific workflows using this box.

Note: it will take Cromwell some time to coordinate SLURM job cancellations particularly for complex workflows, but it will clean everything up for you.
Troubleshoot a workflow
Especially in the beginning if you have catastrophic workflow failures and you can’t even figure out what’s going on, you can come back to this Troubleshoot box to retrieve the entire, unformatted JSON output of all metadata Cromwell has about your workflow. You probably are better served by the “Track Jobs” tab for checking how your workflow is going, but if there’s nothing there that’s helpful, then this box is where you’ll want to go.
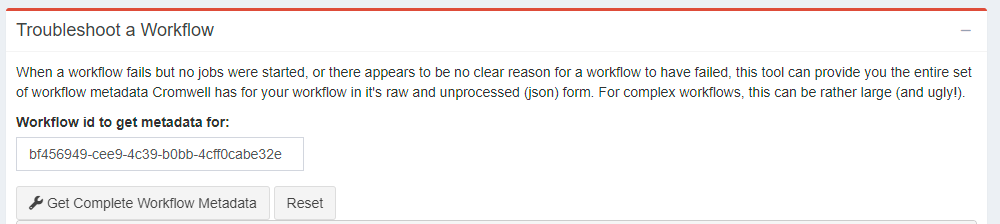

Note: this output is not for the faint of heart, but it will give you hints once you get used to understanding what Cromwell is telling you.
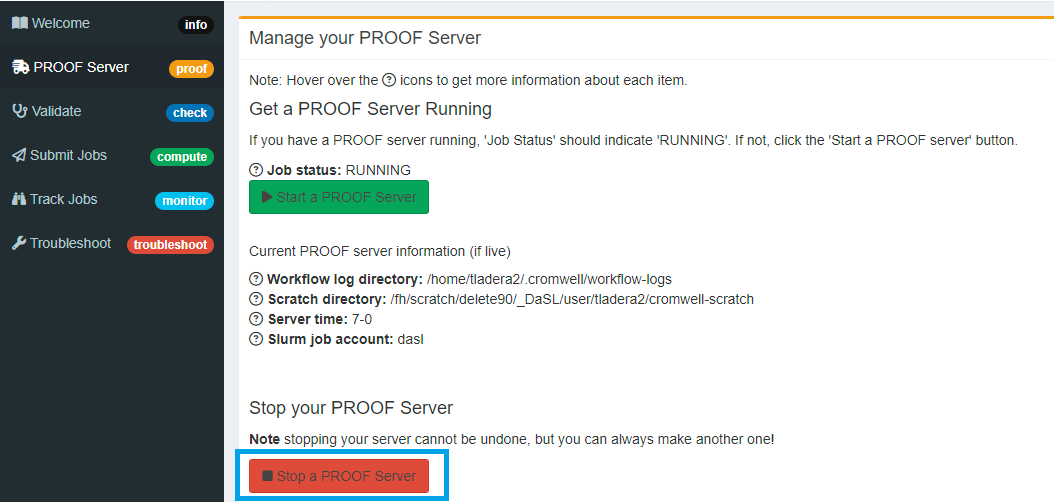
Stopping a PROOF server
Finally if your workflow has finished running before the 7-day timeline (or whatever custom time you set up) you can go ahead and stop your PROOF server.
Go back to the PROOF server tab and click Stop Server
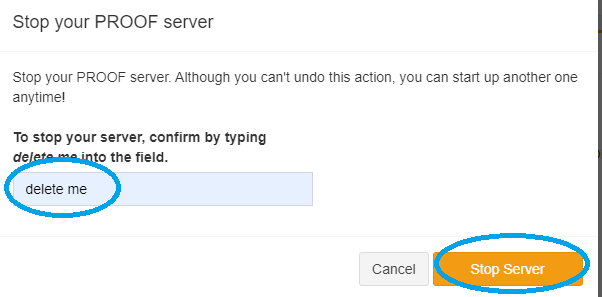
A pop-up box will show up and ask you type out the words “delete me”. This is an added measure so you don’t accidentally end your server.
Resources and Help
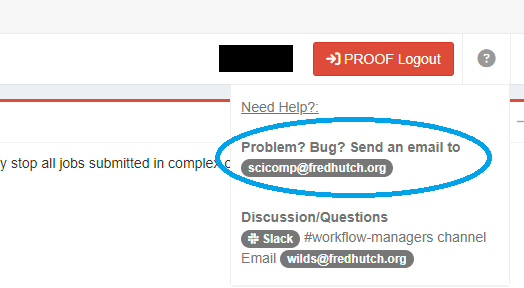
Where to report bugs and find help
If you find something is not working with the app or you find a bug, please help us make this app better by reporting here:
Useful courses to get started
Cluster computing
Building WDL workflows
PROOF mechanics
Document Contributions
We would love to get feedback on this document from the community and would love to hear how we can make improvements to make this more helpful to you! Feel free to email us at or directly make recommendations on GitHub.
Authors
Reviewers