Shiny Applications
Shiny is an R package that makes it easy to build interactive web apps straight from R. You can host standalone apps on a webpage or embed them in R Markdown documents or build dashboards. You can also extend your Shiny apps with CSS themes, htmlwidgets, and JavaScript actions. For more information about Shiny, go to Rstudio’s Shiny page.
There are currently two approaches available for deploying Shiny apps, either manually via Shinyapps.io, or via a SciComp supported pipeline. Which approach is best for a given project depends on what the needs of the app are:
- Using Shinyapps.io to deploy Shiny Apps
- It streamlines with RStudio allowing auto-deployment in the interface.
- There are multiple plans, such as the free plan which currently includes 25 hours activity per month, or the ‘standard’ and ‘professional’ plans which include password protection (both) and custom domain/urls (professional only), for a monthly subscription fee.
- The free plan currently limits users to 5 apps per account!
- Deploying shiny apps on Shinyapps.io does not require the use of GitHub or allows you to include multiple applications within a single GitHub repository if you have many apps to manage.
- Provides a web analytics feature showing app activity.
- Using the application deployment pipeline developed by Fred Hutch Scientific Computing
- SciComp’s pipeline has the capability to host applications written in other languages as long as the application itself can be containerized.
- Integrates with data sources within Hutch campus. For example, the application can be connected to a campus based database system (Postgres, mysql, etc…) without exposing it to the entire internet.
- There is a template repository (https://github.com/FredHutch/shiny-app-template) to help users to assemble their own shiny app.
- Once the application is deployed, updates/re-deploying is done by committing changes to GitHub, as the pipeline is based on a continuous integration/continuous delivery (CI/CD) feature.
- Users can pick their own custom site URL in the fredhutch.org domain (example: ‘myshinyapp.fredhutch.org’).
- User can specify if their app is only facing campus within the firewall or being exposed to the entire internet. Authorization feature can also be included upon request.
- This service is completely free to campus users regardless of usage hours or number of apps.
Test Your Application Locally
Prior to deploying your app, the design and testing phase should be relatively complete. Most apps will function similarly when deployed vs locally, and thus we recommend thoroughly testing your app prior to requesting a deployment. To do so, open the app in an R console.

- Change directory to subfolder ‘app’ under your app root:
cd <your_app_folder> cd app R - Via R console,
source('start.r') - Then go to a browser to check the url: http://localhost:7777
Moving your App to GitHub
To deploy a Shiny app via the Fred Hutch system, you must first have access to the Fred Hutch institution GitHub. You can find more information about getting set up with GitHub at Fred Hutch here. As an overview, you must first create a GitHub username, and then have scicomp connect it to the Fred Hutch institution.
There are two ways to set up your repository and either is suitable.
Note: Documentation for using GitHub at the Fred Hutch is being generated here, and it is a good place to start to find the necessary help you may need to use GitHub to set up your Shiny app.
From a New GitHub Repo
To do a basic set up via the web, go to GitHub and create a new repository in the Fred Hutch institution for your app. Clone your new repository to your local computer.
In the local folder created, create a folder called app and put your Shiny app files (either app.R, or ui.r/server.R) and any other associated data files needed for the app in the app directory.
Once you are finished and have tested your app locally, either via R or RStudio, push your edits to GitHub then request a deployment via these instructions below.
From a Cloned Template
The template for your app can be found in this GitHub Repo (accessible after login):
FredHutch/Shiny-app-template
Clone this repository, remove the unnecessary files listed below and add your Shiny app files to the app directory, before pushing your changes to a new repo on GitHub.
Using Command Line Git
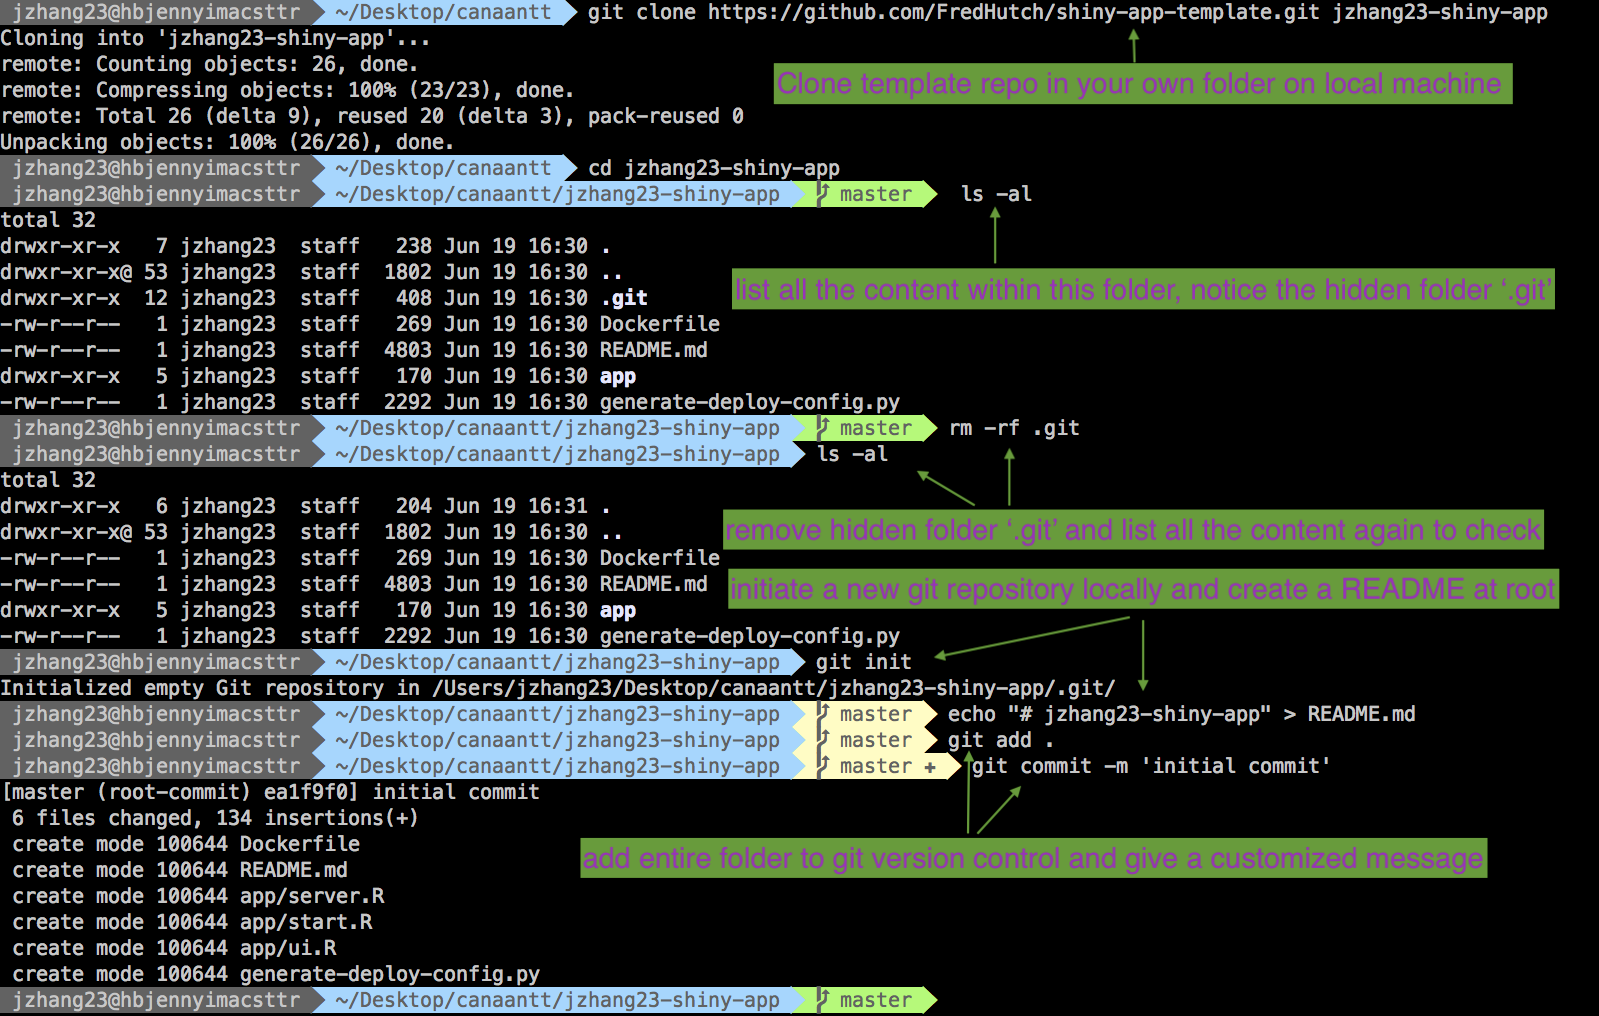
    git clone https://github.com/FredHutch/shiny-app-template.git <your_app_folder>
    cd <your_app_folder>
    ls -al
    rm -rf .git
    ls -al
    git init
    echo "# <your_app_folder>" > README.md
    git add .
    git commit -m 'initial commit'
After the steps above from a terminal, you have achieved these steps:
- Cloned a template
- Created your own repo
- Add a new git control to this repo
Now it’s time to inject your wonderful shiny app to this template. The goal is to put all your app code base to template’s subfolder ‘app’.
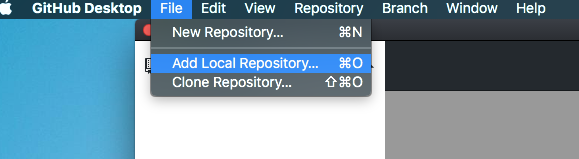
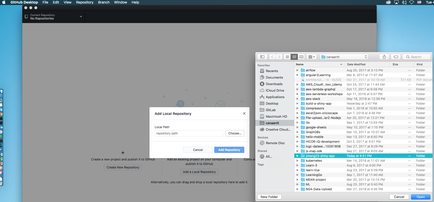
Using the GitHub Desktop Application
To keep track of file changes within a local repo, first add this folder to GitHub Desktop Application:
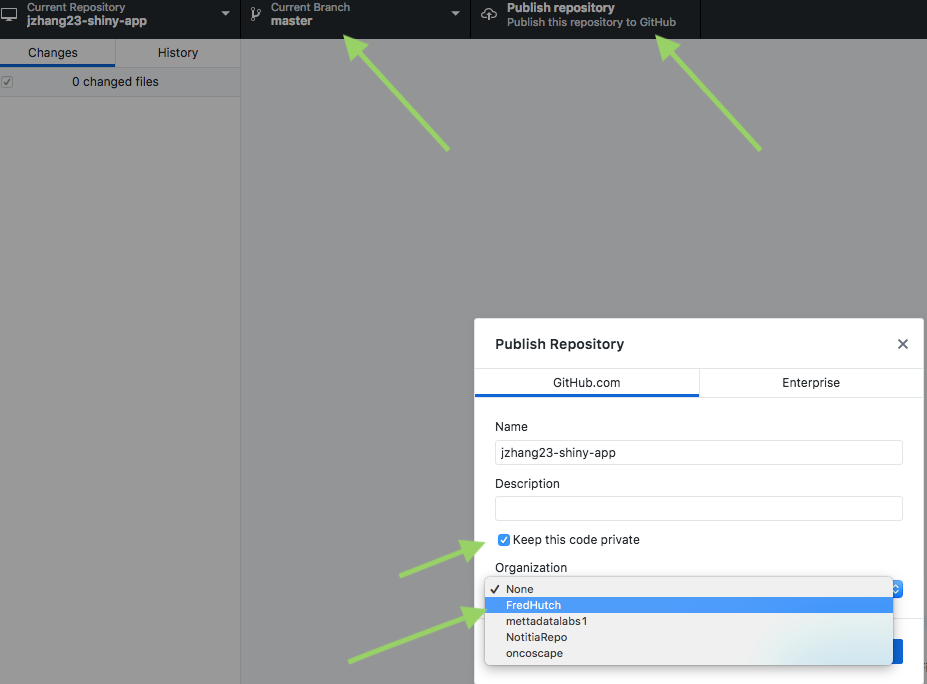
You can create a remote repo by clicking on the ‘Publish repository’ and select the correct branch (in this case ‘master’ is the branch name). You can specify if you want this repo to be private or not. Also, please make sure this repo is under FredHutch as the organization.
Insert Your App into the GitHub Repo
Use your favorite code editor to add your own Shiny app content to your new repository. Here are a few reminders for the shiny apps with a single R script:
- Please put your
app.Rorui.R/server.Rin theappdirectory in the local cloned repository - If you are using the
ui.R/server.Rstructure, make sure you includelibrary(shiny)to bothui.Randserver.Rfiles, and inserver.R, please removeshinyApp(ui, server) - Make sure all files (data, etc) needed by the app are also in the
appdirectory or a subdirectory thereof - Please keep a good record of all your dependencies, you’ll need them to deploy the app
Push Edits to GitHub
After you added your own content to this repo, you are ready to commit the changes and push the changes to the remote repo.
- Now your GitHub Desktop Application console looks like this:
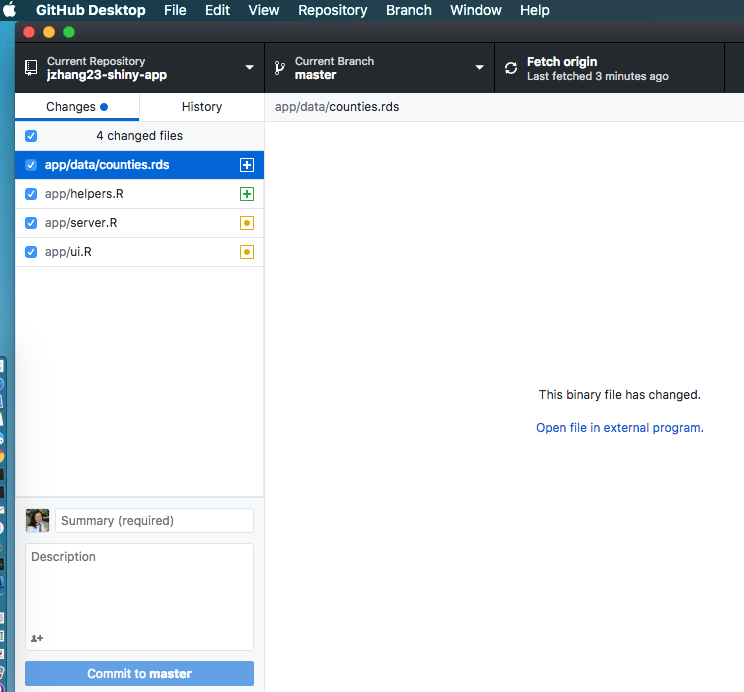
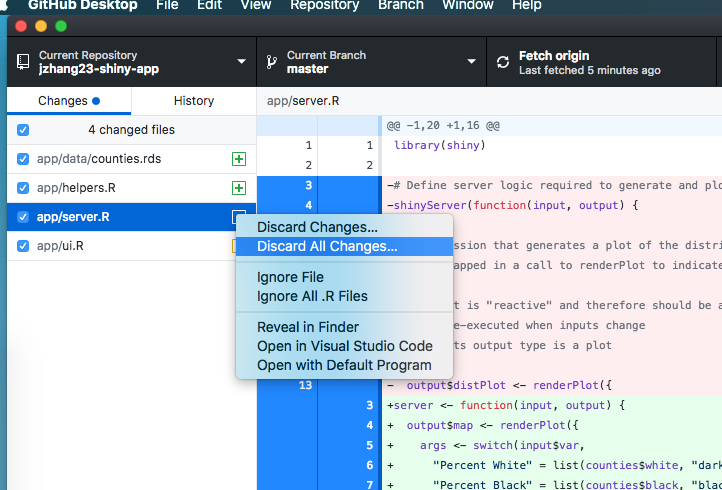
- Two files with green crosses on the right have been added as new files. Two existing files have been modified with yellow dots on the right. You can further examine and adjust those changes by click the yellow dot or right click:
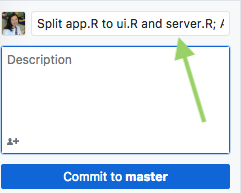
- Write a commit message and click on ‘commit to master’ if you want to commit change to your master branch:
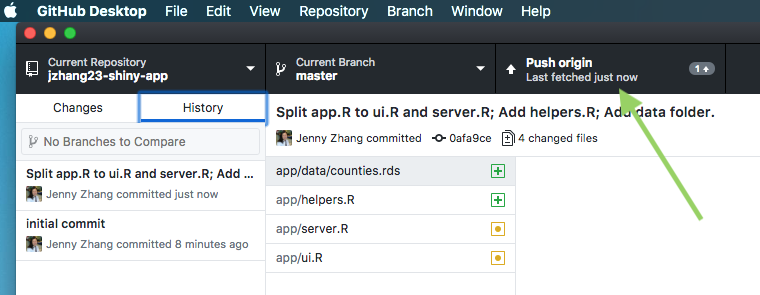
- Push committed change from local files to remote repo
Request Deployment Service from SciComp
If you are ready with your tested Shiny app in a Fred Hutch GitHub repo and have the answers for the below information required for deployment, then go to https://getshiny.fredhutch.org to submit the application deployment request. This request website is only accessible from Campus computers through wired connection or the Marconi wireless network.
-
Is your application version-controlled by Git and in a GitHub repository (repo) ? If so, is it in the Fred Hutch Institution?
-
How do you want to name (DNS name) your application? So the it will look something like
.fredhutch.org -
Is your application facing Fred Hutch internally (open to the Fred Hutch campus) or externally (open to the entire internet)?
-
Does your application require authorization (password protection), that only your collaborators have access?
-
Does your application contain PHI? Please remove PHI from your application?
-
Please list out all the dependencies (R packages you used).